Showing posts with label Sweets. Show all posts

Jul 23, 2014

Ramos Fizz Cheesecake- Light, Fluffy, Delicious!

Light, delicate, healthy cheesecake from Puritan Therapy
Ramos Fizz Cheesecake. Light, fluffy, and delicious!
There are very few foods that I am obsessive about.  I shrug at the Chicago vs. New York pizza debates, I stay neutral on Kansas City vs North Carolina for barbecue, and I think lots of places have great hot dogs.  One of the few things that I am adamant about is cheesecake.  When I was a kid, my sister and I weren't allowed to have sugar.  Part of the thinking at the time was that prohibiting sugar in a kid's diet would prevent diabetes later in life.  In actuality it tends to just promote secretive binging, but that's another story.  Thus, to have a low sugar option for a birthday cake, we would get cheesecake.  It was light and fluffy and we would usually have it with some fresh fruit and a little homemade whipped cream.

The first time I had a cheesecake that was not the one my mom made was when I was in college.  I don't remember where it was, but I do remember being excited for cheesecake.  What I got was a super dense brick on a crumbly graham cracker crust. This was more like eating a cold, over-sweetened paste than what I was expecting.  Even worse, everyone else seemed to think that it was great!  I later learned about New York style cheesecake, and that what I had was actually a good version of it.  I just can't approve.  In my opinion, cheesecake should be light and fluffy.  It should almost be like eating a cheesy cloud.

So, if you are the type of person who prefers their cheesecake more akin to a brick, I may think you're wrong, but I won't judge.  But if this is the case, this is not the recipe that you would want.  The cocktail will still be good, but it will not be your style of cheesecake.

Ramos Gin Fizz

Puritan Therapy- Ramos Fizz Cheesecake
The handle of the spoon is a straw!
As I've mentioned before, I have great respect for a good bartender, especially for their palate.  Which is why I will use my bartender friends as taste testers and flavor advisers whenever I can.  The first time I ever had a Ramos fizz was around the same time that I started really experimenting with chocolates.  I had brought a variety of things to work for a potluck, and then brought all the extras to the bar with me after work.  When Will asked me what I wanted to drink, I handed him a s'more chocolate (small piece of graham cracker with a toasted marshmallow on it dipped in milk chocolate) and told him to make me something to go with that.  He ate it, thought for a moment, and then spent the next 10 minutes crafting this absolutely beautiful drink.  When he put it down, he said that he was playing off of the ideas of milk and cookies.  When I tried it, I was amazed.  It was light, fizzy, creamy, with citrus and a touch of orange.  And it came in a tall glass with a straw spoon, kind of like what you'd get with a slurpee, but fancy and metal.

I have since learned that this is one of those drinks where:
  1. Never order it on a busy night.  It takes a long time and a lot of effort to make.  This can be fine, as long as you understand this and will tip accordingly.
  2. Once you do order it, and the bartender puts it down, multiple people will all ooh and ah, and then they will all want one because it's pretty.  This is the nail in the coffin for the bartender cursing your name under their breath.
Considering that I was just talking about cheesecake, skipping to a cocktail may seem like a nonsequitor.  but look at the recipe, and think about the ingredients for a moment.

    Ramos Gin Fizz

    2 ounces gin (I recommend a french gin that is more subtle and floral than one that has a strong juniper flavor)
    1 ounce heavy cream
    1 egg white
    1/2 ounce lemon juice
    1/2 ounce lime juice
    2 teaspoons superfine sugar
    2 to 3 drops orange flower water
    Soda water
    optional: Orange peel for garnish
Combine gin, cream, the white of the egg, lemon juice, lime juice, sugar, and ice in a cocktail shaker.  Shake for 1 minute, or until the mixture starts to foam (as a note, this is a long time to shake a cocktail, and the minute timer is a minimum).  Strain into a highball glass, and top off with soda water.  The oil from the orange peel adds an extra little pop of orange.

So where is the connection with cheesecake?  The Ramos fizz has dairy, eggs, sugar, and flavorings.  A cheesecake is made with dairy, eggs, sugar, cornstarch, and flavorings.  When I considered the way to make this cocktail into a form of candy, the parallel seemed obvious.

Cheesecake

There are several things I love about this recipe.  To be honest, it's actually a very healthy cheesecake.  It's high in protein, and low in sugar, and all of the perishable ingredients can be pre-measured for you.  In the US, a standard block of cream cheese is 8 ounces.  A small container of cottage cheese is 2 cups.  I never need to worry about using up that little extra bit of, well, anything.   With the idea of low sugar, and high protein, some people (including me on occasion) want to take it a step further and get the trifecta of low fat as well, by using low or nonfat cream cheese and cottage cheese.  IF you choose to make a basic cheesecake instead of the Ramos Fizz cheesecake, substitute away.  The end result will be a firmer cake, but still definitely tasty.  If you are making the Ramos Fizz cake, I recommend against it, and this is why.

*Science Warning*
It is a matter of acid.  If you remember pH from high school chemistry class, there is a range from acid to base.  Cakes (flour or flourless) need an acidic batter to set up or they will end up just being a pudding.  The more acidic the cake, the faster it will set up (but the drier it will be).  If you use low or non fat cheese in your cheesecake, you are making the batter more acidic.  Thus, if you decide that the cake seems too mushy, this is an easy way to adjust it to your liking.  The Ramos Fizz cheesecake is actively adding more acid and drying agents.  Lemon juice, lime juice, and gin all have a drying effect on the cake.  If you make that even more acidic, by removing more of the fat, the result will be an almost chewy cheesecake, which is not what we want at all.
*Science End*

A quick word about equipment. For a long time, equipment tended to be the barrier for me trying to make this.  My mom always used the blender, the hand mixer, and a springform pan.  These days I will usually still use a springform pan, but instead of using multiple appliances, I will just use two attachments on my stick blender.  It takes up less space, and there's less to wash at the end.  Other than that, the only potential challenge is cleanly separating eggs to create a foam.

Ramos Fizz Cheesecake

    6-8 large eggs
    8 ounces cream cheese at room temperature
    2 cups cottage cheese
    1/2 cup sugar
    3 Tbsp cornstarch

Flavoring
    1 tsp gin
    1/2 tsp lime juice
    1/2 tsp lemon juice
    1/4 tsp orange flower water

  1. Preaheat oven to 300 degrees F.  
  2. Separate enough eggs to make 1/2 cup of egg yolks.  
  3. Combine the egg yolks and cottage cheese, blending until smooth.  
  4. Add the cream cheese, corn starch, and sugar.  Continue to blend until smooth.  
  5. Mix in the flavorings.  
  6. Whip the egg whites to stiff peaks.
  7. Fold the egg whites into the yolk mixture gently.
  8. Pour the batter into an ungreased springform pan, and bake in the center of the oven for 1 hour.  When one hour has passed, turn off the oven without opening the oven door and allow to cool in the oven for 1 hour.
  9. Allow to cool to room temperature, and then chill in the refrigerator.
Tips and Recommendations
  • Use a 3 bowl method of separating the eggs.  One for the egg whites, one for the yolks, and one for the egg that you are currently separating.  That way, if a yolk breaks, you only lose one egg, instead of the whole batch.
  • For easier separating, use eggs that are as fresh as possible.  As eggs age, the whites get thicker, and the yolk gets more delicate.  The most recent time I made cheesecake I used some of my farm fresh eggs, and was amazed at how easy it was to separate them.
  • All of the leavening in this recipe comes from the foam created by the egg whites.  That is the most important step.  If you overwhip the egg whites, the foam will collapse, and you will have a puddle in the bottom of the bowl.  This will affect the texture of your final cake.  Beat the egg whites just until the point of stiff peaks.  This means that, if you remove the beater from the egg whites and turn it upside down, the egg foam will stay pointy.
  • Ensure that the bowl that you use for the egg whites is completely clean of fat.  Even if there is a tiny residual drop of dish soap, the egg whites will not create a foam.
  • If using 4 smaller pans instead of a 10 inch pan, cooking time is reduced to 15 minutes, and then the cakes can rest in the oven for 30 minutes.  I have not found an ideal cooking time for cupcake sized cheesecakes at this point.
  • For a basic flavor for cheesecake, you can use 1 tsp vanilla extract and 1 tsp almond extract instead of the Ramos Fizz flavorings
  • If you do not have a springform pan: It is still possible to have a successful cake with a normal 10 inch round cake pan.  However, as the cake pan needs to be ungreased, line the bottom of the pan with parchment paper (the cake needs to be able to cling to the sides of the pan to help rise).  When taking the cake out of the pan, insert a knife at the edge of the cake and run it all around the edge to separate it from the wall of the pan, and then gently turn out onto a plate.  It's trickier, but can still work. Just remember that it is a very delicate cake, and while it would still taste the same when broken, it would still be sad.

Final Analysis

Financial Outlay: The ingredients aren't very expensive.  It is even possible to make this without special equipment, although I personally would not choose to foam egg whites by hand.  It is much easier with a springform pan, but I've made it work in the past without one.  It is just trickier.

Time: For a full sized cheesecake, it will be in the oven for 2 hours.  So it does take longer than a normal "floured" cake.  The prep, however, doesn't take much more time than making a cake out of a box.  It's not a last minute cake, but it's also a cheesecake, so there is no time spent frosting it either.

Quality: The quality is amazing.  Of course, I may be biased.  People will be amazed if you tell them there is only 1/2 cup of sugar in the entire cake.  The quote from a bartender friend of mine after I gave her a mini cheesecake was "Wow, it's like you make pot brownies, but with cocktails!"  As a note, with only a teaspoon of gin in an entire 10 inch cake, there is no way for anyone to get drunk off the cake.

Fun: I find a certain satisfaction in properly dealing with the egg whites.  From getting the eggs separated without breaking yolks, to the brief moment of fear (every single time) that the egg whites won't foam, to getting the whites whipped to just the right consistency.  Then, of course, is the best part.  Eating a cheesecake that doesn't make you feel like you ate a brick, plus is less than half the calories of a Cheesecake Factory cheesecake.

Apr 22, 2014

Baking for Child's Play

I have finally almost recovered from PAX East. While a three day convention of gamer geeks is always one level of exhausting, this year I decided to take an extra step to get involved with the Cookie Brigade.  The cookie brigade is a group of, essentially, guerrilla fundraisers for Child's Play. Child's Play is a charity that provides toys, games, and books to children's wards in hospitals.  Essentially it's gamers coming together to fight the stereotype that video games are a force of evil, and do an awful lot of good in the process.  Child's Play also just happened to be founded by the same guys who run PAX. I know it's somewhat circuitous, but it makes sense in the end, right?

Volunteers will bake an insane number of cookies, candies, and other types of baked goods.  Some people will bake thousands of cookies for this three day weekend, and there's even an achievement of the dozen dozen dozen. Yup, that is 1,728 cookies baked by one person, for one three day weekend. Then, other volunteers (and sometimes some of the same ones) will give out all of these treats for free, while being exceptionally grateful for all the donations to child's play that we receive.  Every cent goes directly to the charity.

I actually took a couple of days off of work before PAX just to have more time to bake. There were some oatmeal raisin cookies, chocolate chip cookies, rice krispy squares, raspberry meringue kisses, and some other bake sale-esque standards, but I thought I would share some of the lesser known things that I made:

Kirby Marshmallows

If you ever played video games in the 90's, you will probably recognize Kirby.  The marshmallow to the left is somewhat simplistic, but hey, so is the design of the character.

Marshmallows are fairly easy to make, in the realm of candy, and I've found that there are two different types.  Those that contain egg whites, and those that don't.  It isn't a question of being vegetarian, as they still contain gelatin.  So unless you choose to use a purely plant based gelatin, they will not and cannot be vegan.

Other than the egg whites, the recipe is basically the same.  Sugar, corn syrup, water, gelatin, vanilla, and then a "marshmallow mix" of powdered sugar and corn starch.  If you have tried any of my gummy candy, the basic ingredients aren't that different. 

Alton Brown has a reasonably good marshmallow recipe that does not contain egg whites.  I've tried the recipe, and it's not bad.  I don't, however, think that the result creates quite as light and fluffy an end product as what I could get in a store.  So as much as they look cool, and I could impress people by saying that I've made marshmallows, or go ahead and make all sorts of interesting flavors, they don't make it all the way to "oh my god" good.

If I want to get to that level, I have to turn to David Lebovitz. His is my go to recipe. Instead of weighing out my gelatin (as it's between 2-3 envelopes of standard gelatin), I will usually just use the 3 whole packets. I've done it both ways, and there is enough flexibility in the execution that they turn out great.  If I'm feeling lazy, or if I don't have an immediate use for the egg yolks, I will just use meringue powder/dried egg whites. 

Now the question, why egg whites?  If you've ever made a meringue or an angel food cake, you can probably guess.  Thinking about food science, what is an egg white and what does it do? If you said that it is a source of protein, and adds structure to whatever it is in, you get a gold star.  When baking, protein creates the scaffolding to provide form and structure.  This is the reason why bread (which uses a high protein flour) is chewier and can support larger air bubbles than a cake, which uses a low protein flour.  Another way to consider it is to think of bubble wrap.  Bubble wrap is a strong structure that will trap air inside.  In this case, the egg whites (along with the gelatin) is the 'plastic' from the bubble wrap that will hold the air.  If the plastic is weak, the bubbles will break, and the air escapes, leading to a dense, flat marshmallow.  If the plastic is too strong, however, there would be a lot of air, but it would be way too chewy.  Because of the huge amount of air that are in store bought marshmallows, I want to be able to maximize the air inside.  The egg whites help me do that. 

Because I wanted Kirby his traditional pink, I added a few drops of red food coloring until the mixture was the right color, and poured it out to set in cake pans.  Once the marshmallows set, a cookie cutter and some cake decorating gel brought his cheerful face to life.

Chichi Dango Mochi

Tri-Colored Chichi dango mochi
This is a type of rice cake that I came to learn about from people who grew up in Hawaii.  It not only has a coconut flavor to it, but also happens to be both gluten free and vegan, just by accident.  While friends of mine consider anything that's not at least 2-3 color mochi substandard (as it is traditional in Hawaii to do 2 or 3 colors) it is equally as tasty if it is just plain white.  The recipe I use is a blend of a few other recipes I've found, so I will put it here.  But virtually any chichi dango recipe will be pretty much the same.

Ingredients:
1 Box (1 lb.) of  Mochiko 
1 12 ounce can of Coconut Milk
2 cups sugar
1 teaspoon baking powder
2 cups water
1 teaspoon vanilla
1 teaspoon salt
Kinako (optional)
Food coloring (optional)
  1. Preheat oven to 350 degrees Fahrenheit.
  2. In a bowl, combine the Mochiko, sugar, and baking powder.
  3. In another bowl, combine the coconut milk, water, and vanilla.
  4. Add the wet ingredients to the dry and mix until combined, making sure to scrape the bottom of the bowl.
  5. If making single colored mochi, pour into a greased 9x11 inch pan, cover tightly with tinfoil, and bake for 60 minutes, or until the top appears fully set.  Let it cool fully in the pan.  Slice into small squares (1-2 inches) and eat.  If desired, roll pieces in Kinako before eating or storing.

    If making tri-colored mochi, separate batter into 3 equal parts.  Add food coloring to achieve desired colors.  Grease a 9x11 cake pan, and pour the first part in the bottom.  Cover tightly with tinfoil, and bake for 10 minutes, or until the cake has set (there are no puddles on the top).  Pour the second color on top, re-cover with aluminum foil, and return to the oven for 20 minutes, or until the layer has set.  Finally, add the third layer, cover with aluminum foil, and bake for an additional 30 minutes, or until the final layer has set.  Let it cool fully in the pan.  Slice into small squares, roll in kinako if desired, and eat.  

Peanut Butter Fudge

I previously did a post on my peanut butter cookie fudge here, but even the basic peanut butter fudge is so good that it bears repeating. While the peanut butter cookie fudge is quite good, the original recipe is just about perfect, and can be found on the Marshmallow Fluff Page.  I tend to use a candy thermometer when I make it, but it is not necessary.  The ingredients are all very basic, with the only potential difficulty being marshmallow fluff.  Outside of New England I've heard it can be a little harder to find.  On occasion I've substituted regular marshmallows for it if I was running short.

There are also variations to try if you're being adventurous.
  • The peanut butter cookie fudge linked above
  • After pouring out into the pan to cool, mixing in swirls of Nutella, or other peanut butter friendly spreads
  • After pouring out into the pan to cool, add a thin layer of chocolate to the top.
This fudge is fun because it is relatively easy to mold (for the larger silicone molds).  I did one batch as the portal companion cubes.  However, I have found that the molds tend to dry out the edges of the fudge, so there is a give and take there.  The molds make the pieces adorable, but the quality is a touch higher with just the squares.  I did have an idea during the craziness of baking, but I haven't had the opportunity to try it out yet. If it works, it will warrant its own post, so you'll just have to check back.

Feb 14, 2014

Capturing Valentines Day: Sweet and Bitter

Negroni Gummy Candy
I'm not a big proponent of Valentines day.  Traditionally, I've been much more of a fan of shopping for clearance candy on the 15th.  But this year, I was in the local grocery store, and found some $2.00 silicone ice cube trays that made small heart shaped ice cubes.  With the resulting cubes being the perfect gummy candy size, how could I resist?

Being hearts, and being Valentines day, I knew that I wanted to do something red.  Sazaracs make good hard candy, but I'm not quite as sold on them as gummy candy.  I wanted to try something new.  And I didn't want to use anything cranberry juice based, because I figured that finding a good balance of tart and sweet would be a pretty big challenge.  After wracking my brain for a naturally red cocktail, I picked the brains of some of my more, um, "alcoholically knowledgeable" friends.  Some of the recommendations I got were a sloe gin fizz, a Singapore sling, a negroni, and a few other obscure cocktails. The negroni is the favorite cocktails of one of my favorite bartenders, and I have found that bartenders tend to give free beverages when you bring them candy (especially homemade cocktail flavored candy).  Thus, I decided to try that.

Negroni cocktail.  Bitter in a glass.
The recipe for a negroni is as follows:

1.5 ounces gin
1.5 ounces campari
1.5 ounces sweet vermouth

Stir all 3 ingredients in a highball glass with ice.  Garnish with orange peel.

Here is a very important note about this cocktail.  It is bitter.  Seriously bitter.  I am under the impression that this is one of those cocktails where you either love it or hate it.  Personally, I am not a fan. But, feel free to substitute the negroni with your favorite cocktail.  I have had wonderful results with most other cocktails, including a 20th Century, margarita, dark and stormy, and mamie taylor.

To make the candy:

1 negroni (without ice)
6 packets gelatin
2 cups sugar (plus extra for dusting)
water

Special equipment: candy thermometer

Mix a negroni without the ice, and add enough water to make 1 cup of liquid.  Instead of the orange for this, I added a dash of orange bitters (and a couple of drops of red food coloring, for that extra bright red).  Sprinkle the 6 packets of gelatin over the liquid and set aside to bloom.  If using molds, have them out and ready.  Otherwise, grease a 9x9 pan.

In a saucepan, mix 2 cups of sugar with 1 1/4 cup of water.  Attach a candy thermometer, and heat the mixture to 300 degrees Fahrenheit.  Remove from heat, and mix in the now solid negroni gelatin mixture. As soon as the mixture is incorporated, pour into the molds to set.  I find a small disher works beautifully for this process.  If using a pan instead, pour all the mixture into the pan.

Negroni Gummy Heart Candy setting
Let the candies cool to room temperature.  If molds were used, pop the candies out of the mold.  They can sometimes be a little sticky, so just be a little patient, and pull slowly. Once removed from the mold, toss to coat in sugar.  The sugar will help keep the candies from sticking together, and will also help make them last longer.  If a pan was used, slice the candies into squares, or use small cookie cutters to make shapes.  Toss the pieces in sugar.

Final Analysis 

Financial Outlay: I'll be honest, buying gummy bears or acid jellies is a cheaper option. But this is why I'm always trying unusual flavors that don't really exist anywhere else.
Time: About 30 minutes of active work, plus time to let the candy set.  I may be guilty of making gummy candy as a last minute "bring something to a party" treat, throwing it together before hopping in the shower to get ready to go out.
Quality: In general, these are excellent.  In this specific case, with the negroni, I reserve judgement until I have someone who actually likes the cocktail taste the candy.  Although I do find the sweet/bitter balance a little interesting, as the bitter is all at the back end of the flavor.
Fun: As I have made gummy candy on multiple occasions now, it should be obvious that I like doing them.  While there are risks of crystallization any time you work with sugar (and burns whenever working with anything that hot), there is virtually nothing that can go drastically wrong, like seizing when working with chocolate.  I say try it! Just maybe not with a negroni...


Dec 17, 2013

Bake a Better Christmas Cookie

Making tastier Christmas Cookies
Growing up, my house was not a Christmas Cookie house.  In fact, my house was not an any sort of cookie house, except for selling girl scout cookies. My in-laws, however, are the baking type.  They start baking in early December, and run straight through till Christmas.  I think there's usually at least ten types of cookies, plus pecan rolls, making up plates for offices, schools, neighbors, churches, etc.  It's an impressive sight to see.  Being back in Boston, and not in Hawaii (so having a little extra heat from the oven is a good thing) I've been having a fair amount of fun getting into the Christmas cookie habit myself (although on a much, much smaller scale).  A mug of hot apple cider, a Christmas movie marathon, and a table full of cookies, royal icing, piping bags, and candy accouterments sounds like a great way to spend an evening to me.

I am not going to be the one to tell people what recipes to use for any Christmas Cookies. Often it is much more tradition than baking, and tends to factor into the "taste" of Christmas for people.  I'd rather talk about techniques.  Anyone who has ever made cut out sugar cookies knows how finicky they can be.  There are very few ingredients, and the general flavors can be very subtle.  That tends to mean that there are an awful lot of ways to mess it up.  Cut out sugar cookies are pretty much the pie dough of the cookie world.

Life lessons that I have learned making cookies:

  1. Butter: As one of the main flavor components, I always make sure that my butter is fresh.  It should smell like butter, and only like butter (not like anything else from the refrigerator).  Also, if the recipe calls for creaming the butter and the sugar, the butter has to be the right temperature.  If the butter is too warm, the cookies will be greasy, flat blobs.  Cold butter takes longer to cream (and can be hard on a hand mixer). But as long as you keep the butter below 68 degrees (when it starts to melt), then creaming will help to add air into the cookie, providing a lighter finished product with better texture. General tip: When starting a recipe, turn on the oven to preheat, cut your butter into chunks, put it in the mixing bowl, then gather and prepare the rest of your ingredients.  The increased surface area will help to warm the butter faster, but not overwarm it.
  2. Gluten: When making bread, the goal is to work the dough a lot, to create gluten and end up with nice, chewy bread. Cookies are not bread.  While some gluten is desired to help keep the cookies together and not become crumbly (which is why most cookies call for all purpose flour instead of cake flour), over working cookie dough is much more likely than underworking it.  The result is that what should be a light, tender cookie is tough and hard.  This is also why, when making cut out cookies, the first ones tend to come out nice and pretty, and the more times the dough is rolled out, the worse they are.
  3. Oven temperature: Most home ovens are not precise on their temperature.  America's Test Kitchen has someone come in to calibrate their ovens once a month.  A basic oven thermometer can be bought for under $10, and can save a lot of heartache in poorly baked cookies.  I even go the extra step and keep a pizza stone on the bottom rack of my oven to act as an insulator, helping to keep the temperature even.
  4. Baking Process: First, every time you open the oven, you're letting heat out. And the longer the oven is open, the more heat can escape.  Therefore, when I put cookies in the oven, I usually have the cookie sheet on top of the stove, with my oven mitts on before I open the oven.  I'm losing the bare minimum of heat possible, and the cookies spend more time in the oven at the correct temperature.  This also means  I open the oven as few times as possible while cookies are in there.  Most modern ovens have a window in the front, and a light inside.  Use them.

    I have also found that, for many types of cookies, baking cookies is like cooking eggs.  When cooking eggs, always take the pan off the heat slightly before they look done.  The heat of the pan will continue cooking them.  It's the same with cookies.  It took me multiple batches of ginger cookies before I learned when to take them out of the oven.  If they looked done, the bottoms were going to be overcooked.
As far as decorating sugar cookies goes, I'm not an artist.  I can't draw, I can't paint, even my handwriting is atrocious. Bee in our Bonnet has some fabulous information on sugar cookies and decorating them. This year I tried using tricks I learned from that post for my cookies, with mixed success.  My royal icing was too firm to really "flood", but the decorating was a lot cleaner than ever before.  Any of the "mixed" part is all my skills, and not the suggestions from the site.  I did even try a little bit of this "knit" technique on one of my cookies.

Be mindful of the details, and be happier with your results.  And don't forget, most importantly, have fun!

Dec 4, 2013

Three Blind Mice Never Tasted So Good

There are many things that I dislike about winter, which is why I choose to look at the positives as opposed to hiding under my bed for multiple months, waiting for it to go away. While the utter lack of humidity leads to my hair doing an impression of a hedgehog due to static, the same lack of heat and humidity make it the perfect weather to start making chocolates again!

A friend of mine recently bought a house, and after I was lusting over the size and counter space of her kitchen, invited me over to help break it in.  She and I had originally taken a truffle class together, but where I obsessively proceeded on to make all sorts of different candies, she was happy to just go home and eat her candy. When I asked what she wanted to make in this new kitchen, she said that she wanted something with chocolate.

I think that chocolate mice are probably the least exacting type of candy that I've made. When I went poking around online to see if it were possible to make something like Mounds or Almond Joy, I came across directions that essentially said to mix corn syrup with coconut until you have about the right texture.  Cool, shape, and coat in chocolate. Conveniently, that is, in fact, about all there is to it. But, as I'm really bad about staying short winded, there's a whole lot more below.

Before we talk about ingredients, I just want to say a word about corn syrup. If you have never made candy, but have all of the talk about high fructose corn syrup, you may balk at any recipe that uses corn syrup (although High Fructose Corn Syrup and what is in the baking aisle are actually different). What's insidious about high fructose corn syrup isn't actually the ingredient on its own.  It's the fact that it's in everything, so that "moderation" that the corn refiners ads talk about gets really difficult really fast. Start checking labels.  Things that you would never expect to have sugar in them have high fructose corn syrup, like bread. In candy, corn syrup helps to keep crystals small, and helps to keep things chewy.  So it is highly advisable to not just omit it.  Also, remember, we're making candy.  We already know it's not healthy.  My advice, enjoy the treat for what it is, and keep portion sizes reasonable.  If you're still concerned about the difference, check out this article.


Ingredients


  • Shredded Coconut
  • Corn Syrup
  • Chocolate or Candy Melts (dark or milk, your choice, but don't use chocolate chips.  They contain anti-melting agents that will just make your life harder.)
  • Optional: almonds (or anything else that you think will taste good with coconut).

Prepare the Chocolate


In this application, the chocolate will be used as a coating over the coconut, so we need to melt it. If you have never worked with chocolate, there are two very important things to know. First, chocolate is actually very sensitive to heat. It has many different crystal states within a pretty small range.  What does that mean? If you have ever had a candy bar that has melted and re-solidified, you have experienced this.  It won't have a nice snap to the chocolate, it will melt at a lower temperature, it won't be shiny.  Just generally not as pretty.  In chocolate terms, it's out of temper.  The good news is, if you are working with a good solid block of chocolate that is already in temper, it's not that hard to keep it that way.

Secondly, water and chocolate are not friends.  They are anti-friends.  Even a tiny bit of water in melted chocolate will cause it to seize, and then you can't use it for dipping your mice.

Some people will advocate using the microwave to melt chocolate.  This can work, but I've not had much success with it.  I have the bad habit of over heating the chocolate.  So I prefer to do things the old fashioned way.

If you decide to use candy melts, there is no need to chop your chocolate. I find the flavor isn't quite as good as with real chocolate, but I will admit that they are a lot easier to use, and there is no risk or seizing.

If, instead, you are using a large bar of chocolate, get out a good solid knife to chop it down. Why?  Because as I said above, chocolate is sensitive to heat.  I want to use as little heat/time as possible to get it all melted evenly.  Smaller pieces, that have a high surface area, will melt faster.  The general goal is to get the chocolate into nice, tiny pieces that are all about the same size.

I melt my chocolate at home by putting it into a metal bowl, and putting that bowl on top of a small pot with a couple of inches of water in it.  In this case, my friend had a Pyrex bowl that would also withstand the heat, so we just used that.  Put the bowl of chocolate on top of the pan before turning on the heat.  Steam= water, and if any gets into your chocolate, that can leave you very sad with a bowl full of seized chocolate that will never be used for dipping, and little naked coconut mice.

Heat the chocolate slowly over low heat, stirring often, and turning off the heat periodically if the water in the underlying pot reaches a simmer.  The chocolate will be heated by the water under it, not by the stove.  You only need to get it to about 70 degrees Farenheit, so there's no need to rush it.

The Coconut Mixture


After trying the method referred to above, I realized that yes, there's very little actual measuring involved.  In this application, about half a bag of coconut made give or take 20 mice.  So I use the amount of coconut to approximate the number I want to make, and will mix in the corn syrup accordingly. Mix in small amounts at a time until the mixture will stick together well enough to work with.  To test it, grab a small ball from the bowl and squeeze it into a ball.  If it sticks, and isn't sprouting little coconut hairs, you are good to go.  At this point, if you just want to make little candy bars, shape them, dip them in chocolate, let them set, and you're done.  Personally, I think the mice are kind of cute.


I have a scoop that I use for this next part, for the sake of making mice that are about the same size.  But a spoon will work just about as well. Start scooping out little balls of coconut, and roll them between your hands to get it nice and compact.  This step can be very sticky, so I will often rinse my hands in cold water to help keep the coconut from sticking.

Each mouse will take 1.5 balls of mixture, so make several balls as bodies, and then half as many balls of the same size for the heads.  The balls that are made for heads, cut in half and roll them into little cones, using your hands.  To add the ears, I will take a dab of melted chocolate, and add it to one end of the body.  Take two slivered almonds that are about the same time, and use the chocolate as glue between the head and the body.  Chill the mice in the refrigerator for about 10 minutes or so, making sure that there is no residual water on the bodies (I usually will do the mice in batches, so that by the time I have finished the last bodies, the first ones to go in are ready for dipping).

Dipping


Now that the bodies are chilled and the chocolate is melted, it's time to start dipping.  Take a mouse, put it into the chocolate, coating completely, then remove (a fork works just fine here), letting excess chocolate drip off.  then place on parchment paper or a silicone mat to set. The cleaner this step is, the better, but you can also just trim some extra chocolate off the edges once it's hardened.  As you can see from the photos, I'm definitely neither a professional nor perfect!

If you don't want blind mice, you can use icing, or candy googly eyes, or anything else I haven't thought of.  In my experience, they don't tend to last long enough for anyone to notice.


Most importantly, have fun. You can always eat mistakes, and cleanup can be a tasty job too! Don't forget to lick the bowl!

Analysis

Financial Outlay: Under $10 for over 20 mice, each about 2 inches long
Time: About 1 Hour
Quality: Tasty!  The visual beauty may vary depending on your skill with chocolate, but these are handcrafted!  If you got one at a candy store, it would probably be at least $2 each. Also, people tend to be really impressed when the notice that it's a chocolate mouse as opposed to just a blob of a candy bar.
Fun: I like doing these. The recipe is easily scale-able, the coconut mixture is kind of like a really crumbly clay, it's tasty, and can be done with multiple people who may not have much kitchen experience.

Oct 31, 2013

The Other Fall Flavor: Apple Cider Gummy Candy


Over the past few years I've watched the "pumpkin" trend become huge.  Pumpkin lattes, pumpkin cookies, pumpkin beer, pretty much anything that someone can add the flavor of pumpkin to becomes pumkin-y as soon as it hits fall.  I tend to shrug at the whole thing.  I don't have anything against fall or pumpkins; I'm just not a huge fan of anything when a fake flavor is added to it.  That, and I tend to prefer the other "fall flavor".  Apples.

When I was a kid, we had an apple tree in my yard.  I remember picking apples with my sister, attempting to climb the tree, me trying to stand on her shoulders to reach the top...  It really is amazing that neither of us ended up in the emergency room because of that thing.  But the apples that grew on it were amazing, and we always made plenty of applesauce from the apples that we picked.

Living in Boston, many years later, I tend to be conflicted with regards to the fall past time of apple picking.  On one hand, getting the apples directly from the tree tend to give you the best possible fruit; the apples that you pick will last for months in the refrigerator; the cider, and cider donuts at Honeypot Hill are amazing; and it's one of the few times when it is socially acceptable, as an adult, to climb trees (a skill which I am quite pleased to still posses). On the other hand, it is more expensive, and because it's a "thing" that all the folks in the city do as a fall activity, I kind of want to tell everyone there that I'm not just a tourist, that I've worked on "real" farms; that I'm not the type who will run screaming away from a mosquito, having never seen one before.  The tipping point is a good friend of mine who grew up in Hawaii.  He gets a huge kick out of being able to pick an item of food off a tree and just eat it directly.

Being close to Halloween, I decided to stick with the theme of candy.  One of my favorite types of candy to make is gummy candy.  It's easy to make, and easy to adjust the flavor profile.  Also, it allows me to make them into all sorts of fun shapes. It's one of the great things about the prevalence of silicone ice cube trays these days is that they work equally well for the making of candy. I may be slightly obsessed, and have several of them in all sorts of fun shapes.  For anyone with geek tendencies, there are several fun ones at Thinkgeek.

So much better than store bought gummy bears!

Apple Cider Gummy Candy

  • 6 Cups Apple Cider
  • 1 1/4 Cups Granulated Sugar 
  • 6 Envelopes gelatin
  • 1 1/4 Cups Water
  • Optional: cinnamon, sugar
Reduce the apple cider until there is only 1 cup, by simmering in a 2 quart saucepan.  This is the slowest part of the whole recipe. If you boil the apple cider, it will give a different flavor due to caramelizing the sugars. I try to do this part the day before, because it needs to cool before adding gelatin.  The good side of having to spend a long time simmering apple cider is that the entire house will smell amazing.

After the cider has been reduced and cooled, place it in a bowl and sprinkle the gelatin on top, to allow it time to bloom while cooking the syrup (if you want to add cinnamon, now would be the time to do so).

Always be careful when making candy, as serious burns can occur.
Put the water and sugar in a saucepan, and attach a candy thermometer.  Cook over medium heat until the syrup reaches the hard crack stage, at 300 degrees Farenheit.  Add the cider/gelatin mixture, and mix until fully incorporated.

Candy setting in silicone ice cube trays


Pour mixture out to cool, in either a greased 8x8 inch pan, or into silicone molds, and allow to cool to room temperature.

If the mixture was set in a pan, then either slice the gummies into squares, or use cookie cutters to cut out shapes.  If silicone molds were used, then the candies can simply be popped out of the molds. At this point, they will still be sticky, and you have a choice.  If you set the candies out to finish air drying, the edges will be a little tough, like a swedish fish, but will still be soft and chewy in the center.  If you want to keep the entire piece soft and chewy, you can roll each in a coat of granulated sugar.  Personally, I like to maintain the details from my molds, and will let them air dry just a little before packing them in tupperware.  While they will get tougher over time if they are not coated in sugar, they never seem to last long enough to make that an issue.

Oct 23, 2013

Don't Fear the Candy: Turning Candy Corn from Trick to Treat

My fall "decorative" table.  Pumpkin, apples, and homemade candy corn!
It's getting close to the end of October, and we all know what that means, Halloween! Costumes, candy, apples, pumpkins, colorful leaves (and in my case a silver tabby who decides that it's cold enough to be a constant lap cat); it's a holiday almost made for creativity. As a kid I always made my Halloween costumes. And no, you don't get to see any pictures of those.  To the best of my knowledge, none exist. But between my sister and I we did have some great ones.  Spider, skunk, coke machine, some monster type creature that sprung fully formed like Athena out of the random depths of my young mind... All I remember was that it was purple and green, and I got to use these rubber monster gloves with fur on the back of the hand.  Yes, I was an odd child. Not really a surprise.

You should always be prepared for the challenges of your costume.
Over the past several years I've really lacked costume inspiration. My attempt to rock the classic "Charlie Brown" style sheet with eyes in it as a ghost led to an unfortunate incident where a group of people questioned if I was supposed to be KKK. And I am currently less than a week out from a Halloween party and still haven't even decided on a costume.

Where I have found inspiration, however, is with the Halloween candy. One of the great things about October is that it is usually cool and dry enough to make candy making a good idea. I have decided that, even if you're not the type who wants to try making candy, everyone should have the chance to eat the "real" version of candy types, just to understand the comparison.  The use of preservatives, cheaper ingredients, modified production methods and such do make candy available to a wider market, but at a price.  And that price is usually either flavor or texture.  There is absolutely no comparison between homemade marshmallows and the kind that you get for $1 a bag (although if I'm going camping, I would probably still just grab the bag of them for s'mores).

To that extent, I know lots of people who really hate candy corn.  It tends to fall squarely into the "why would people eat that?!" category, and can be considered sugared wax. To those folks, I would definitely recommend trying the real thing.  And, while I am not one of those people, it is exactly what I decided to do (and I'm really glad that I did).

As this is the first time I was attempting to make something, I turned to Alton Brown.  Because while the flavors of his recipes often require a bit of tweaking, the technique is usually spot on. So the link to the recipe is here. The basic idea is to mix powdered sugar, powdered milk, and salt thoroughly (no lumps!); make a syrup with corn syrup, granulated sugar, water, and butter (bring it to the softball stage); combine the two along with a little vanilla; cool, color, and shape.  The only special equipment that you would need is a candy thermometer. That really doesn't sound so hard, does it?

Here are the three colors of dough for the candy corn.
Here you see the dough after it has been cooled, separated and colored (sorry, it's hard to take pictures while carefully managing temperatures of a syrup.  I'd really rather not get a sticky 230 degree substance on myself, or my camera). Yes, you also see the first run of candy corn I made, before I was planning on making this a post.  I just didn't take any pictures during the first go round. I guess that just means I have more to eat.  Oh horrors...

To create the corns, roll the dough into thin ropes, and lay out three ropes.  One white, one yellow, and one orange.  Squeeze the colors together so that there is just one long tri-colored strip.
white white white white white white white white white white white white white white white
yellow yellow yellow yellow yellow yellow yellow yellow yellow yellow yellow yellow 
orange orange orange orange orange orange orange orange orange orange orange orange 
Cut the strip into triangles kind of like this, using either a knife, a pizza cutter, or a bench scraper:
_____________________________
VVVVVVVVVVVVVVVVVVVVVVVVV
Unlike with the storebought candy corn, you will end up with half of it with a white point, and half with an orange point. After the candy corn is cut, if you feel the need you can smooth out any rough side edges.  It acts just like edible clay and if you want to make other shapes, it would be easy to do so.  I have some thoughts that I want to play with, to add to my "geek candies" The last step is to lay them out for a little bit to dry, just so that they don't get all smushed.

Completed candy corn, set out to dry
And one of the advantages of being the one to make it? You can snack on all the rough edges or ugly pieces!

The taste is really a lot better, and it is not waxy at all.  I assume that in the store bought stuff, there is actually wax.  Does this take a lot more time than just buying it?  Of course. Is it worth it?  That's up to you.  Personally, I've been developing the perspective that if I'm going to eat something that's not that healthy for me, I'd rather have it be the highest quality possible (unless I'm specifically craving junk.  I have not yet undertaken making my own devil dogs, hmmm...).

A note about doing this with kids. Once the dough has cooled enough to color and handle, assembling the candy corn is something that I think that kids could help with (of course, be completely honest with yourself about the kids that you are working with. I have some adult friends that I may not trust making candy corn, let alone children.).  As far as the first steps go, however, please remember that making candy has the potential for serious burns, and should not be done with young children.

Oct 1, 2013

Desperately Seeking Samoas

There has been a nasty cold going around Boston, which led to me staying home from work sick for two days. Legitimately sick, not "oops, I have a cough.  Vacation day on the couch for me!".  I am historically very bad at admitting that I am sick and staying home accordingly.  I could be dragging my spleen behind me, and I'd be saying "no, I'm fine, really!"  So this was actually a pretty good accomplishment for me.  The downside was that I fell behind on my blog entries. The upside is the following true story, proving that I am quite happy to laugh at myself.

Despite all of my baking, candying, and other unhealthy food making, I don't tend to keep much in the way of sweets in the house.  I make things, and then tend to just feed everyone around me. Co-workers, friends, my favorite bartenders, pretty much anyone who I think would appreciate a tasty treat. Not only does it give me a way to avoid eating 10 tons of junk, but it also gives me the excuse to keep making new things. Occasionally this backfires, however.

On Monday I had a scratchy throat.  Monday/Tuesday morning I felt as though I'd been gargling razor blades. This was about the time that I decided that work was just not going to happen that day. I proceeded to stay in bed, feeling very grateful for my tablet, so that I could peruse Facebook and chit chat with people at my leisure. Around lunchtime, I realized what I wanted.  I wanted cookies.  Of course, I have no cookies in the house.  There is a 7-11 close by, but I didn't want prepackaged cookies.  That was just not going to cut it.  And there was no way that I was going to attempt to go to a bakery with good cookies.  Let's be honest, there was no way that I was going to leave my apartment. I started the mental rundown of cookie recipes, waiting for my lizard brain to shout "Yes!" (this is, in fact, the way that I tend to make all decisions on what to eat/drink).

Crack, in Cookie Form.
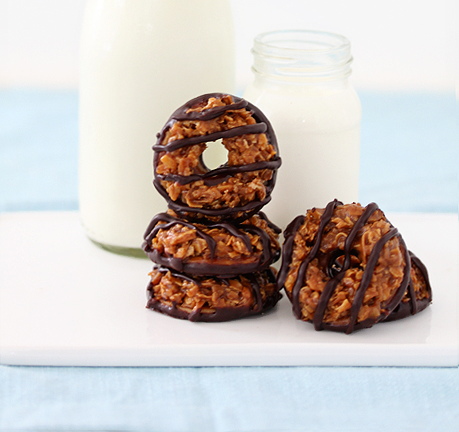
I had found this recipe for homemade Samoas a while back, and had been meaning to try it.  Depending on your girl scout council, you may know them as Caramel Delights.  If neither of these names have any meaning to you, then please, just walk away.  This is not me judging you, this is my attempt to save you from cookie crack. There's a reason that girl scouts sell so many cookies, and Samoas may be that reason.

As soon as I thought of it, my lizard brain decided that is what it wanted, no questions or substitutions.  So I look through the recipe. Basic sugar cookie ingredients, no problem.  Chocolate, no problem (I may have an entire cabinet of chocolate making supplies). Coconut, no problem. Caramels. Fifteen ounces soft caramels. Well, crap. That is a problem. I don't even have a caramel sauce that could be used to fake it. Meanwhile, I know that my lizard brain is not going to be satisfied until I get these cookies. Sigh. 

Well, if there is one thing that I'm good at, it's problem solving. I don't have caramels, and if I just change the flavor profile of the cookie, that is not going to be satisfying.  But! I have sugar. Sugar is in caramel.  And cream. And corn syrup. And despite the fact that I've never actually made caramel, I do know some of the physics of sugar (as a note, I would highly recommend this article by Harold McGee, in which he discusses the melting point of sugar.  It's actually a topic that is still debated). I also had this recipe by David Leibowitz for a salted butter caramel, that I had been tempted to try.

So yes, what I'm saying is that I proceeded to make caramels.  I will give you the full image, for your amusement.  First, I'm sick, with stuffed up sinuses, unshowered, and in my bathrobe.  Because tending to caramel is similar to watching a precocious two year old, it has to be constantly watched.  Therefore, I grab a chair, and sit down in front of the stove, so that I can carefully watch the temperature of the cooking sugar. I can only imagine that the image was rather amusing.  Or maybe it's just me.

The caramels recipe is very good, although they are not "soft" caramels.  The second time I made them I tweaked some temperature points, and used a higher quality butter, and they turned out amazing.  But, that's getting side tracked.  After pouring the caramels into a pan to cool, and sitting down to rest for a little bit, I proceeded to make the sugar cookies, then the topping, and then put them all together. If you opt to try to make your own Samoas, believe it when the recipe says that the coconut burns quickly, and to keep a close eye on it.  The coconut on the edges of the pan will brown very quickly, and not evenly with respect to the rest of the pan.  I did not, however, burn mine (yay!)

I think that I finally had finished cookies at around 7:00 PM. Yes, it was a ridiculous thing to do when sick. Yes, it would have gone a whole lot faster if I'd had proper ingredients. But I gotta tell you, the finished cookies? Totally worth it. Also, I had a little bit of the caramel and coconut mixture left over at the end.  So I made them into balls and just dipped them in chocolate.  All I will say about those is that it is something that will definitely, definitely happen again.

Sep 10, 2013

The Building Blocks of Baked Goods Part 3: Correcting a Quickbread

This is a continuation from The Building Blocks of Baked Goods, as well as The Building Blocks of Baked Goods 2. The previous two parts discuss ratios in baked goods, and how to check to see if a recipe is unbalanced.

The recipe that I started with is this zucchini bread recipe from Paula Deen. It has too much liquid, too much sugar, and it is slightly over leavened. The flavors, however, are still good.  So I know that I want to keep the spices, and balance out the rest of the recipe.

The first step is to peg your limiting reagent. In other words, pick one ingredient that you want to use to calculate the rest of the recipe. Eggs are an easy pick, since it is much more difficult to measure half an egg than half a cup of flour. In the case of zucchini bread, if you only have a limited amount of zucchini, that could be the limiting reagent.  When I've made angel food cake, I've sometimes used the flour, to ensure that I have the proper volume for my pan.  It doesn't really matter, as long as we just pick one.

Let's start with the original ingredients (using weight measurements for all structural components, of course):

447 grams all-purpose flour
1 1/2 teaspoons salt
1 teaspoon ground nutmeg
2 teaspoons baking soda
1 teaspoon ground cinnamon
916 grams sugar
218 grams vegetable oil
200 grams beaten egg (appx. 4 eggs)
78.9 grams water
340 grams grated zucchini
1 teaspoon lemon juice

I want to make sure that I maintain the size of the recipe, so that I still end up with 2 loaves of bread.  Therefore, I am going to opt to use my flour as the limiting reagent.  Hopefully my eggs will play nicely for weight. Therefore, 448 grams of flour (I am rounding up slightly to make math easier) will be 1 part.  Because the volume will be about the same, I am going to leave the spice amounts to be about the same.  I also want to keep the zucchini amounts the same, if I can, based on what I tasted from the previous recipe.

Now, let's take the ratio for a balanced recipe:
If 1 part = 448 grams

1 parts flour = 448 grams
1 parts liquid = 448 grams
.5 part egg =224 grams
.5 part fat = 224 grams
1 part sugar = 448 grams

Flour and sugar are clear enough, as we are only using one type of each.  The fat is the adjusted weight of the vegetable oil, and liquid includes the egg, vegetable oil, water, and zucchini.

Adjusted weight of vegetable oil: 224 grams fat * (218 grams vegetable oil/204 grams fat)=239.4 grams.

Liquid: 633.4 grams (1.4 parts)
224 grams egg
239.4 grams vegetable oil
170 (.5 * 340) grams zucchini

The sum of the weights (and yes, I am being rather low with the weight of the zucchini) is already higher than that of the flour.  Therefore, I'm going to leave out the water altogether.  If I wanted to be even pickier about weights, I could substitute shortening for the vegetable oil, or try to extract some extra water weight from the zucchini, or even take out an egg yolk for a little extra structure.  Based on how the recipe turned out previously, though, I'm going to just risk it.  I'm going to assume that the zucchini will also help to provide some structure to the bread as well.  I would not, however, try to make this recipe in a cake pan.  With the high liquid amounts when compared to the amount of protein, it would just sink in the middle.  So it's convenient that I'm using a bread pan to begin with.

Two last notes, before I give you the recipe (which you've waited oh so patiently through 3 blog entries for). First, a word about salt.  I use kosher salt.  I buy it in a big box at the supermarket, and it lasts a really, really long time.  I never thought much about salt, but I started noticing that everything I baked was requiring extra salt.  I really didn't understand it until I read an article about the differences between types of salt, and then once tried weighing out the salt for a recipe.  Table salt has been milled, so that all the crystals are a uniform size.  Kosher salt, on the other hand, is made up of bigger, chunkier crystals.  Not only does this mean that sometimes it doesn't distribute quite as well throughout a baked good (oops!), but because the crystals are bigger and chunkier, there is actually less salt (and more air space) in a teaspoon of kosher salt than a teaspoon of table salt.  Confused?  Think of it this way: If you take a jar, and fill it with wooden blocks, the jar is not completely full.  There is a lot of air in between the blocks.  If you take an identical jar, and fill it with rice grains, there is a lot less air.  When I weighed out the salt for something I was baking, it turned out that, in order for me to get the right amount of salt, I needed to use about 50% more than what I was measuring.

Secondly, I want to talk about leavening.  I have now done the recipe below with both baking powder, and baking soda/lemon juice.  There are benefits and drawbacks to each method.  Baking powder is usually double acting (as opposed to single acting baking soda), so I have found that it produces a slightly lighter, fluffier bread. Using baking powder means that we would leave out the lemon juice, however, which contributes to browning on the top of the loaf.  If you want to try using baking soda instead of the baking powder, just remember to use 1 teaspoon of baking powder per cup of flour, plus just a touch extra to account for the weight of the zucchini.


Finally! Here is my "corrected" Zucchini Bread Recipe
Zucchini Bread: Fix a bad recipe, and making it your own.  Math never tasted so good.
Who says Math isn't tasty?
448 grams  (appx. 3 1/2 cups) all-purpose flour
448 grams (appx. 2 1/4 cups) sugar
239.4 grams (appx. 1 cup) vegetable oil
224 grams beaten egg (appx. 4 large eggs)
340 grams (appx. 2 cups) grated zucchini
1 1/2 teaspoons table salt
1 teaspoon ground nutmeg (freshly grated recommended)
1 teaspoon ground cinnamon
1 teaspoon baking soda
1 teaspoon lemon juice

.Preheat your oven to 350 degrees.

Use the muffin method to mix the ingredients.  Mix the flour, sugar, salt, nutmeg, cinnamon, and baking soda (all of the dry ingredients) in a bowl.  In a separate bowl mix all the wet ingredients thoroughly: vegetable oil, eggs, lemon juice, and zucchini. Add the wet ingredients to the dry ingredients, and stir only to combine. *

Bake in 2 loaf pans for about 1 hour, or until a toothpick entered into the center of the loaf comes out clean.

*Remember, we are making a quick bread, and don't want it to be tough or chewy.  Therefore, we want to limit the amount of gluten that we form.  Mix the wet and the dry ingredients well separately before combining them. The more we stir the mixed batter, the more gluten we have a chance to form.


Sep 4, 2013

The Building Blocks of Baked Goods Part 2: Spotting a Bad Recipe

Recognizing a bad recipe
This is the second installment of Building Blocks of Baked Goods.  This post is about using ratios to analyze a recipe.  Otherwise known as, if a recipe goes bad, it's not necessarily your fault.  If a recipe comes from a famous chef, or a famous site or book, it doesn't mean that the recipe has been fully tested for anyone to make.  So before you proclaim that you can't bake, and that everything you make is horrible (unless, of course, you're trying to get out of having to ever bake again), take a closer look at the recipe itself.

In the last section, I talked about ratios, and problems that I had with Paula Deen's zucchini bread recipe. Today I want to walk through it, and try to figure out if I just failed somewhere with my baking, or if it was a problem with the recipe.  Before I get started, I need to say that I don't know how Paula measures her flour.  It is not stated in the recipe, and the actual amount used can vary widely depending on how that happens. So I am going to start with weight averages, and move on from there.  As I am just using this to give me a rough guide of whether or not this recipe is balanced, these variations are not going to create major issues.  If the measurements are close, then I will assume that the recipe is fairly balanced, and then just work off of my weight measurements for the next go round.


The first step is to convert the structural elements to weight measurements. By structural elements, I mean the flour, eggs, sugar, fat, and liquid.  These are the elements that create the form and the texture of the bread. Ingredients like cinnamon and nutmeg, which only provide flavor, we can leave alone for the moment.


I tend to use Wolfram Alpha for doing conversions, just because it's easy to use.


Flour

3 1/4 cups all-purpose flour = 447 grams

Sugar

3 cups sugar= 916 grams

Eggs

4 eggs, beaten= 200 grams

Fat

1 cup vegetable oil= 218 grams (204 grams fat weight)

Wait, why are there two seperate measurements?  Because vegetable oil is not a pure fat.  Therefore, we have to reduce the weight a bit here.  I am using calculations based on what I found in Bakewise for this.

Liquid


4 eggs, beaten= 200 grams

1 cup vegetable oil= 218 grams
1/3 cup water= 79 grams
2 cups grated zucchini= 340.2 grams (170 liquid weight)

Total Liquid weight: 667 grams


Just like we had to adjust for the amount of fat in the vegetable oil above, here we have to adjust for the amount of liquid in the zucchini.  Some zucchini can be up to 95% water weight.  Just for the sake of giving the recipe the benefit of the doubt, I'm going to peg it at 50% (since I may have already done the math on this, give me the benefit of the doubt on this one that it will still work out right).


Quickbread Ratios

There are 3 steps that I'm going to take to look at the balance of this recipe.

First, I am going to take the ratio for a quickbread from Michael Ruhlman.

1 parts flour
1 parts liquid
.5 part egg
.5 part fat

So let's see how our recipe stacks up on this measure. My flour is 447 grams, and I'm going to peg my calculations on that.  So 1 part equals 447 grams.

Flour: 447 grams * 1 part/447 grams= 1
Liquid: 667 grams * 1 part/447 grams= 1.49
Egg: 200 grams * 1 part/447 grams= .45
fat: 204 grams * 1 part/447 grams= .49

The ratio for the egg and the fat look pretty good, especially considering that I said all of this is a rough estimate.  But look at the liquid! It's 50% higher than it should be. No wonder I noticed all my precious bubbles escaping.

Second, let's look at the sugar.  There are 916 grams of sugar to our 447 grams of flour.  That is more than twice the amount.  Even when making a high ratio cake, the sugar should only be slightly higher than the weight of the flour.  So I know that there is way too much sugar here.

Third, let's look at leavening. There should be about a quarter teaspoon of baking soda per cup of flour, with a little extra to account for the weight of the zucchini. That would mean that there should be somewhere around 1 teaspoon of baking soda, instead of the 2 teaspoons found in the recipe.  But considering that there is only 1 teaspoon of lemon juice to activate the baking soda, it may not all be activated to begin with.  Either way, I think we can reduce the amount of baking soda in this recipe as well.

Lessons Learned

Yay, it's not just me!  I know, if it had been just me, I wouldn't have gone to the trouble of writing this up. But where do we go from here?  I could just ditch the recipe and try a new one.  However, I don't want to do that.  First, validation for my math tastes oh so good.  Secondly, I really liked the general flavor profile of this bread.  Re-balancing it will be much easier than tearing it down, I promise.

Aug 26, 2013

Recipe: Peanut Butter Cookie Fudge

Fluff: Marshmallow Cream
Disclaimer: This is not a healthy recipe; and considering that it's full of peanut butter, it is probably considered a dangerous weapon and banned in most schools in the United States.  I find this funny, considering that I was introduced to the original recipe for the (unadulterated) peanut butter fudge through every school bake sale.  

Several years later I scoured the internet to find a recipe close to that of the cracklike fudge I grew up with.  All I knew was that the secret ingredient was Fluff, and it included no chocolate whatsoever.  I finally found it!  You can find the original recipe here, and it's as good as I remember.

Are there ways to make it "healthier"?  I suppose that you could use freshly ground, low salt peanut butter (or other fancy types of nut butters), or make your own marshmallows to use instead of the fluff, but let's be realistic.  Part of the appeal of fudge (especially this fudge) is the fact that it is NOT good for you. It is a delightful comfort food. It falls into the same category for me as Devil Dogs.  They are not high quality cakes, but they are perfect for what they are, and trying to "improve" them kind of ruins that balance. My advice?  Accept that what you are going to eat is delightful, yet bad for you, and let that thought help limit how much of it you eat.


To Purchase: http://www.shopbiscoff.com/product/32348
In a swag bag at an event recently I got a jar of Biscoff cookie spread.  It is like a cookie, but in peanut butter form. I suppose, like with Nutella, there are people who consider this the greatest thing ever. I am not one of them.  To me it is a little disturbing on it's own. But I saw potential for candy making. Adding this to the peanut butter fudge produces a flavor more in line with cookies like Nutter Butters.


Peanut Butter Cookie Fudge

2 1/2 c. sugar
4 Tbsp unsalted butter
1 can (5 oz) Evaporated Milk
1 Jar (7 1/2oz) Marshmallow Fluff
1 1/2 tsp. kosher salt
6 oz Creamy Peanut Butter* 

4 Oz Biscoff Cookie Spread

* The peanut butter provides the bulk of the flavor in this recipe.  If you would not want to eat it straight out of the jar with a spoon, you probably want to use a better quality peanut butter.  Also, as it is a fudge, I recommend not using a no-salt peanut butter.


1. Prepare the container for the fudge to set. Either
  • A 9 inch square pan, either well greased or lined with parchment paper for simple rectangular pieces.
  • Silicone baking/ice cube tray for individually molded pieces 
2. Combine the sugar, butter, evaporated milk, marshmallow fluff, and salt in a large saucepan.  Use a pot larger than you think that you will need, because the mixture will bubble up quite a bit.  You do not want to let it bubble over, as molten marshmallow can cause serious burns (and a huge mess).  Heat on low until the butter melts, and the ingredients are well incorporated.

3. Attach a candy thermometer to the side of the pot, and increase the heat to medium. Stir continuously, scraping the bottom, until the mixture reaches the soft ball stage (235-245 degrees F).  If the mixture burns to the bottom it will affect not only the flavor, but the texture of the resulting fudge.


Easy recipe, and super tasty!
Star Wars, Doctor Who, and Portal Fudge
4. Remove from heat, and mix in the peanut butter and the cookie spread. Continue stirring until all of the peanut butter and cookie butter are incorporated, and then pour into the container to let the fudge cool and set.  If you choose to use silicone molds, the fudge must cool completely before being removed from the molds. In the picture to the right I did not follow my own advice (as I was testing out some new theories) and the shapes did not come out as cleanly as I would have liked.