Showing posts with label First Attempt. Show all posts

Oct 21, 2014

Homemade Filtered Milk Punch

Milk punch may be the "new" hipster equivalent to home infused vodkas.  It can have all the buzzwords like artisan and handcrafted, has its own history and trivia, and it's a booze that you've probably never heard of.  Out of the two types of milk punch, one is actually not that bizarre to most Americans, at least not during the Christmas season.  Take milk or cream, mix with rum or brandy and serve chilled, perhaps with nutmeg or cinnamon.  Sound familiar yet?  How about if I add egg?  Eggnogs (and flips)  are actually an offshoot of milk punch.

The other type dates back to the 1600's, and focuses more on a longer shelf life.  In fact, one of the more famous recipes comes from Benjamin Franklin himself. While anyone who has been in bad college housing knows, milk will separate given enough time (or poor enough refrigeration).  As the 17th century was not exactly known for their refrigeration technology, they took a hint from cheese makers to extend shelf life.


For those unfamiliar with how cheesemaking works, the very basic process is as follows:
  • Heat milk.
  • Add rennet/acid to separate curds from whey.
  • Remove curds from whey, and process depending on the type of cheese.
Conceptually, very simple, right? Well, on a basic level, the process for making a filtered milk punch is as follows:
  • Heat milk
  • Mix alcohol, sweetener, and acid.
  • Add hot milk to alcohol mixture.
  • Remove the curds and retain the liquid for drinking.
From a food science perspective, milk punch is rather intriguing.  There are multiple ways in which flavors can be absorbed into the solution.  Water soluble, alcohol soluble, and fat soluble flavors can all be utilized.  The first milk punch I ever had, at Backbar, was flavored with Fruit Loops. It was disconcerting because it actually did taste like Fruit Loops, in a completely liquid form.  The first time I attempted making milk punch with a friend, I decided to be a little cheeky, and play off of the idea of milk.  We made a chai milk punch with mulling spices.  The overwhelming success of that led us to experiment a bit more. Other successful flavors that I've tasted (but have not made myself), are passionfruit, and scotch pina colada.

Basic Milk Punch Recipe

750 mL white rum
2 Cups Simple Syrup
1 Cup Lemon Juice
2 Cups Whole Milk
Flavoring*

Special equipment needed: cheesecloth

First of all, simple syrup is one of those things that you should never buy.  For 2 cups of simple syrup, combine 2 cups of sugar with 2 cups of water, and heat in a saucepan until all the sugar has dissolved.

Combine the rum, simple syrup, and lemon juice. If your flavoring is alcohol or water soluble, add the flavoring to the mixture.  If your flavoring is fat soluble, add the flavoring to the milk.

Heat the 2 cups of milk in a saucepan over medium heat until bubbles appear at the edges of the pan.

Add the milk to the rum mixture, and let sit for 30 minutes, to allow the milk to fully curdle.

Strain the mixture through cheesecloth, and discard the chunks.  Serve chilled, and store the milk punch in the refrigerator for up to 2 weeks.

Some of the Flavors I have personally experimented with (and results):

Milk Punch Flavors steeping in alcohol

Chai

Because I had the spice mix handy, I simply used mulling spices.  The label called for 1 Tbsp of spices for one 750 mL bottle of wine, so I stuck with that.  

It worked beautifully, and can be a nice substitute for falernum in cocktails.

Add spices to the milk.

Raspberry


1 cup of frozen raspberries, or any other frozen fruit.  This is one of the few situation when fresh is not necessarily better.  The process of freezing helps to damage the cell walls, so that it will release flavors even easier than fresh berries would.  

It was very tasty, and had a beautiful color.This is a flavor that I will definitely try again. As a variation, I plan to use the raspberry seltzer syrup from Flour, Too.  This recipe includes sugar, lemon juice, and lime juice.  To avoid the punch from becoming overly sweet, I would plan to use the raspberry syrup instead of the simple syrup.

Add the fresh fruit to the alcohol mixture.


Frosted Flakes


This was an idea from my friend/partner in booze.  Because the first milk punch we'd had was Fruit Loops, he was interested in what other breakfast cereals could be milk punch.  Use 1 cup of crushed Frosted Flakes.  

The flavor of Frosted Flakes came through clearly.  Personally I found this disturbing, but I also found the Fruit Loops milk punch disturbing. My friend who initiated this idea approved though.  Considering that I am the one making recommendations here, be prepared for an odd beverage.

Add the crushed flakes to the alcohol mixture.


Chocolate Chip Cookies

We wanted to play with the idea of things that would go well with milk.  One of the obvious food items that works with milk is cookies.  One cup of crushed chocolate chip cookies is used for a batch of milk punch.

This was a complicated flavor, because cookies are a complex food.  There are aspects that are alcohol soluble flavors, and some that are fat soluble flavors.  With the experiment that we tried, we put the cookies in the alcohol mixture.  I think that it may be possible to get a better flavor by splitting the cookie crumbs between the alcohol and the milk; in effect getting the best of both worlds.

The jury is still out as to whether the crumbs should be added to the alcohol or the milk.


Toast


This is the flavor that I was the most skeptical of. My friend wanted to play on the breakfast theme, taking a step away from the cereals. Originally he thought of toast and jam, but we decided that if the toast came out well, we could always add some of the raspberry milk punch as jam.  This would be about 6 slices of crushed toasted bread for 1 batch of milk punch.

I found the juxtaposition of flavor and texture of the toast milk punch a little too much of a hurdle.  The texture of toast is a very important part.  Thus, the fact that I'm drinking a nice cool liquid tasting of toast was a little too disconcerting.  My friend combined a bit of the toast milk punch with some of the raspberry, and quite liked it though.

The toast crumbs were added to the alcohol mixture.


Final Analysis

Financial Outlay: The most expensive part of this project is the rum, possibly followed by the cheesecloth. If you want to make a swanky punch for a party, this can be a very economical answer.

Time: It is probably about an hour total to make, plus chilling time.  If the plan is to make punch for a party, this means that you can make it ahead of time, and keep it in the fridge until it is time to serve. But it is best when cold, so this is not an instant drink.

Quality: This definitely depends on the flavor chosen.  In my opinion, the chai and the raspberry flavors worked very well.  In those cases, the quality was well worth it.

Fun: It is possible to get very creative with flavors.  The experimental run I did used 4 different flavors for 1 batch of punch.  All the flavors were put into the alcohol solution.  Not every test flavor may come out tasty, but that doesn't mean that you shouldn't try.

Feb 19, 2014

A Sous Vide Most Fowl

Like it or not, there are certain things that are just plain harder to cook than others, even with a judicious use of food science. Thinking of things that fall into this category, pretty much all I could think of were meats. Cooking a whole turkey is a balancing act because of the variety of sizes and shapes of the cuts of meat to contend with. A T-bone is actually two steaks in one, with a bone in the middle. Both duck and pork belly have a thick layer of fat to render, while cooking the meat all the way through and getting a crispy skin. Basically if there are multiple textures, layers, sizes or shapes, it is going to be difficult to cook properly. This is where the sous vide comes in.

After the absolutely amazing lamb, and a couple of perfectly cooked steaks, I started to branch out to try to see if the sous vide could essentially idiot proof some of these challenging foods. Through coincidence of seeing it in the grocery store, I started with a duck breast. With regards to cooking the meat, duck has all the same challenges of any other poultry; undercooked it carries risks of salmonella, overlooked it can be dry or rubbery. Conveniently, when only cooking a breast the challenge of having bones goes away. But duck also has a fairly thick fat layer which really needs to be rendered out, otherwise it just gets greasy and, well, fatty. On top of that, one of the best things about properly cooked duck is the crispy skin. Considering that the proper temperature of the cooked meat is also perfect for getting the fat to render, break out the sous vide!

Simple Sous Vide
After doing some poking around online for times, temperatures, and seasonings, I salted and peppered the duck and stuck it into a vacuum sealed bag. A few hours later I came back to prepare the rest of dinner. 

Just out of the Water Bath
I seared the duck skin in a very hot cast iron skillet, and, as it didn't seem quite crispy enough yet, broke out the heat gun to give it some even higher, more directed heat.

Seared Duck Breast

After that, just slice it up, and I had a perfectly cooked medium rare duck breast.

Sliced Duck Breast
So the important question, how was it? Well, it was quite all right. It was a little bit chewy, and didn't quite have the melt in your mouth texture that the lamb did. But the balance of the skin, fat layer, and meat was nearly perfect. From doing a little poking around on the internet, it is possible that the texture issues were due to the duck itself. Apparently breasts from older ducks tend to get a bit tough, so knowing the source of the duck is even more important than most other meats. For me, duck itself is not so transcendent a meat to make it really worth it. It's good to know that I can make a properly cooked duck breast, but it is unlikely that I would do it often.

The second experiment for a complicated meat was fried chicken. When starting with raw chicken, the temperature of the oil needs to be just right to cook the chicken and the skin properly, and not make the chicken chewy, under cooked, or greasy. Personally, I don't tend to deep fry enough things to have a really good feel for the proper oil temperature (although if you asked me several years ago when I was working grill, I probably would have a different answer). So what if you could idiot proof making fried chicken so that the chicken is already cooked, and the only thing that you had to fry was the skin?

Most good fried chicken recipes that I've seen encourage marinating the chicken in buttermilk or yogurt for a while, to let the enzymes soften up the chicken. Why not just let the chicken marinade while it was cooking, since the temperatures were not going to be high enough to cause any detrimental effects? So, after breaking down the chicken, I mixed up some yogurt, paprika, garlic powder, and cayenne, slathered it all over each piece of chicken, threw them into the bags to seal up, and popped them into a 150 degree water bath.

In this case, I put the chicken into the sous vide before I went to work, so it was probably in there for about 10 hours. All that was left to do was to take it out, coat it in flour, and fry it. Since the internal temperature was already cooked, I didn't need to worry about having my fat too hot (as long as it was below its smoke point). If you were ever interested in how frying actually works, check out this article at Fine Cooking. So the chicken could be fried in a very short time.

How was it? This may have been the absolute best fried chicken I have ever had in my life. The sous vide process eliminated any toughness from the meat, but because it wasn't over cooked, it also wasn't falling off the bone. It was just about perfect. I now want to find the perfect spicing for the chicken, because I would eat it ALL THE TIME. Sorry that I have no pictures of it, it just didn't survive that long.

Final Analysis


Financial Outlay: In terms of special equipment, this requires a sous vide and bags. With the Dorkfood sous vide and my dumb crock pot, that would mean an initial outlay of $140 or so (for both the sous vide and crock pot). The bags themselves aren't very expensive. If you are the type to use a crock pot liner, it would be about the same cost. On top of that, meat costs will vary.

Time: Similar to crock pot dishes. There is usually a reasonably low amount of prep time, then a fairly long wait, then a low amount of finishing time. So not the method for someone who gets home at 6PM and then starts thinking "what do I want for dinner?" but for anyone who is already enamored with their crock pot, or even plans meals ahead, it's not a problem.

Quality: Yes. The quality is definitely better, because it helps to idiot proof preparation methods. With respect to the duck, which was still very tasty, I think that the quality was still much higher than it would have been if I had tried any other cooking method. The fried chicken, I just have to say again, was amazing.

Fun: This is a hard one to quantify. There is a novelty factor involved with the vacuum sealing, and the fun of playing with a new gadget. Other than that, I'd say the fun level is about the same as cooking with a crock pot in general. However, there is one drawback to normal crock pot cooking. Because all the food in a sous vide is vacuum sealed, if something is cooking for multiple hours after you leave the house, when you come back, it smells exactly the same. There is no wonderful wafting scent when you walk in the door. But, for some dishes, it's a small price to pay.

Jan 30, 2014

Sous Vide: Take Your Crock Pot to the Next Level

I've written a few times about the Harvard series of food science lectures from this year.  I consider it a really good thing to understand how food works, both from a nutritional standpoint as well as understanding how to cook an amazing meal.  The problem with having high end chefs do lectures, however, is that they tend to have all sorts of expensive toys that aren't available to the home chef.  While a home chef may have a food torch (although a heat gun can work just as well), virtually no one would have a salamander (or even really have a need for one).

After one of the lectures, a friend and I were wondering what, if anything, would be the next great kitchen appliance that trickled down from the professional kitchen.  Most appliances have remained generally unchanged over the last 50 years.  Sure, you may have a blender that makes soup, and has a heating element, but it is still basically a blender.  It just has some extra bells and whistles.  The last great kitchen innovation was the microwave.  When they first came out they cost thousands of dollars, but now virtually every college student has at least a $20 model in their dorm room.  So what's next?

Anyone who has watched Food Network over the past few years will have eventually heard of sous vide (pronounced "Sue-Vee").  They may have even heard chefs rave about how amazing the results from this are.  But what is it?  Basically, it is a super duper slow cooker.  The idea is that food is put into a vacuum sealed bag, and cooked in a water bath at the temperature that the final product will be. I can hear all the non-foodies now, in unison, going "Okayyy, but why would that matter?"  Let's focus on meat for a minute.  Cooking meat tends to be a balance between time and temperature.  If the temperature is too hot, the outside can be burnt with a raw inside, and if it is too cold, by the time the center is cooked, the rest of it is dry and chewy.  Cooking a good steak using a grill or even a good cast iron skillet takes a bit of skill, and requires good timing.  Even then there is a gradient of "doneness".

Outside seared goodness
medium cooked
pink center
medium cooked
Outside seared goodness

Sous vide takes both the time pressure and temperature concerns out of the equation.  When cooking in the sous vide, the entire piece of meat will be the same temperature as that nice pink center.  It just takes a little longer to get to the right temperature.  So with a steak, the whole thing will be equally medium rare when it comes out of the water bath.  Give it a very quick sear in a very hot pan to get some maillard goodness, and it becomes an immediate perfect steak.  A person can cook a cheaper, tougher cut of beef, which tends to be a lot more sensitive to overcooking without the risk. This makes it obvious why restaurants would want to have a sous vide.  They can serve cheaper meat that turns out just as tasty as more expensive cuts, and they can pre-cook steaks (or many other dishes) to be quickly served at perfect temperatures. But for home use? Is it feasible, and is it even worth it?

A sous vide "oven" is $300 to $600. A thermometer/heating unit/circulator which will attach to a pot is still around $200. These still seem a little gadget-y, expensive, and unlikely to really catch on.  During the course of the conversation about the next great home kitchen appliance, I posited that a sous vide would not necessarily become its own appliance, but that I could see it as a feature of something like a crock pot.  They both are designed to cook at a low temperature for a long period of time, and there are some crock pots where you can set the temperature already; just not necessarily as low as some of the sous vide temperatures.  Also, as the crock pot tends to have heat coming in from both the bottom as well as the walls, it wouldn't require quite as much circulation.

So wasn't I surprised when I received this as a Christmas present.  It's a $99 device that works with any "dumb" crock pot, like mine! To make it work:

  1. Plug the temperature controller into the wall.
  2. Plug the crock pot into the temperature controller.
  3. Fill the crock pot with water, leaving space for the food to go in without overflow.
  4. Set the temperature on the temperature controller.
  5. Place the heat sensor into the water.
  6. Turn the crock pot to high.
The temperature sensor controls the power to the crock pot like a thermostat controls heat to a house, turning the heat on and off to maintain a proper temperature. I like the concept.  It is small, it is cheaper than all the other options (that aren't a "Build it yourself" model) and it improves one of my favorite kitchen appliances.  Which begs the question: Does it work, and does it make a difference in food quality?

The first item I tried cooking in it was a lamb roast that had been sitting in my freezer for... let's just say probably way too long. But, as there was no indication of freezer burn, there was a reasonably low chance of food poisoning from undercooked lamb (as opposed to chicken) in case it sort of worked, and I didn't have to pay any extra for it (since I already had it) I thought it was a good choice for a first run. I stuffed the lamb with some herbs, tied it up, and sealed it up in a zip top sous vide bag.

Based on the thickness of the finished roast after it had been put into a bag, the recommended cook time was somewhere between 4-12 hours at 137 degrees. After seeing that the apparatus was, in fact, working, I left it to do its thing and went out for a few hours.  The downside to this method compared to using a crock pot is that when I came home, my apartment was not filled with the scent of lamb.  It was all sealed in a bag. Oh well, talk about first world problems. After letting it cook for about 7 hours, we took the lamb out of the water bath, and to be safe, I took the temperature of the middle.  137 on the dot. So the temperature controller really did do its job.

Using a crock pot to make the best roast you've ever had
Sous vide lamb roast, after 10 minutes under the broiler
About ten minutes under the broiler to get a nice crispy skin, and we were about ready for the final test.  Did the long low cook make any discernible difference to the flavor, texture, or experience of the meal? I mean, it looked amazing, and smelled really good, but was it worth seven hours?

Look at the picture below, and compare it to the gradient of doneness that I mentioned above.  Notice something?  There is no medium level.  There is a beautiful seared skin, and then perfectly uniform medium rare lamb as far as the eye can see.
A perfect medium rare piece of lamb, every single piece.
The prettiest sliced lamb roast I've ever seen
So finally, what did it taste like? It was absolutely amazing. It was perfectly cooked, tender, and absolutely delicious. I have a feeling that I will be using a lot more of this device in the future.

Oct 23, 2013

Don't Fear the Candy: Turning Candy Corn from Trick to Treat

My fall "decorative" table.  Pumpkin, apples, and homemade candy corn!
It's getting close to the end of October, and we all know what that means, Halloween! Costumes, candy, apples, pumpkins, colorful leaves (and in my case a silver tabby who decides that it's cold enough to be a constant lap cat); it's a holiday almost made for creativity. As a kid I always made my Halloween costumes. And no, you don't get to see any pictures of those.  To the best of my knowledge, none exist. But between my sister and I we did have some great ones.  Spider, skunk, coke machine, some monster type creature that sprung fully formed like Athena out of the random depths of my young mind... All I remember was that it was purple and green, and I got to use these rubber monster gloves with fur on the back of the hand.  Yes, I was an odd child. Not really a surprise.

You should always be prepared for the challenges of your costume.
Over the past several years I've really lacked costume inspiration. My attempt to rock the classic "Charlie Brown" style sheet with eyes in it as a ghost led to an unfortunate incident where a group of people questioned if I was supposed to be KKK. And I am currently less than a week out from a Halloween party and still haven't even decided on a costume.

Where I have found inspiration, however, is with the Halloween candy. One of the great things about October is that it is usually cool and dry enough to make candy making a good idea. I have decided that, even if you're not the type who wants to try making candy, everyone should have the chance to eat the "real" version of candy types, just to understand the comparison.  The use of preservatives, cheaper ingredients, modified production methods and such do make candy available to a wider market, but at a price.  And that price is usually either flavor or texture.  There is absolutely no comparison between homemade marshmallows and the kind that you get for $1 a bag (although if I'm going camping, I would probably still just grab the bag of them for s'mores).

To that extent, I know lots of people who really hate candy corn.  It tends to fall squarely into the "why would people eat that?!" category, and can be considered sugared wax. To those folks, I would definitely recommend trying the real thing.  And, while I am not one of those people, it is exactly what I decided to do (and I'm really glad that I did).

As this is the first time I was attempting to make something, I turned to Alton Brown.  Because while the flavors of his recipes often require a bit of tweaking, the technique is usually spot on. So the link to the recipe is here. The basic idea is to mix powdered sugar, powdered milk, and salt thoroughly (no lumps!); make a syrup with corn syrup, granulated sugar, water, and butter (bring it to the softball stage); combine the two along with a little vanilla; cool, color, and shape.  The only special equipment that you would need is a candy thermometer. That really doesn't sound so hard, does it?

Here are the three colors of dough for the candy corn.
Here you see the dough after it has been cooled, separated and colored (sorry, it's hard to take pictures while carefully managing temperatures of a syrup.  I'd really rather not get a sticky 230 degree substance on myself, or my camera). Yes, you also see the first run of candy corn I made, before I was planning on making this a post.  I just didn't take any pictures during the first go round. I guess that just means I have more to eat.  Oh horrors...

To create the corns, roll the dough into thin ropes, and lay out three ropes.  One white, one yellow, and one orange.  Squeeze the colors together so that there is just one long tri-colored strip.
white white white white white white white white white white white white white white white
yellow yellow yellow yellow yellow yellow yellow yellow yellow yellow yellow yellow 
orange orange orange orange orange orange orange orange orange orange orange orange 
Cut the strip into triangles kind of like this, using either a knife, a pizza cutter, or a bench scraper:
_____________________________
VVVVVVVVVVVVVVVVVVVVVVVVV
Unlike with the storebought candy corn, you will end up with half of it with a white point, and half with an orange point. After the candy corn is cut, if you feel the need you can smooth out any rough side edges.  It acts just like edible clay and if you want to make other shapes, it would be easy to do so.  I have some thoughts that I want to play with, to add to my "geek candies" The last step is to lay them out for a little bit to dry, just so that they don't get all smushed.

Completed candy corn, set out to dry
And one of the advantages of being the one to make it? You can snack on all the rough edges or ugly pieces!

The taste is really a lot better, and it is not waxy at all.  I assume that in the store bought stuff, there is actually wax.  Does this take a lot more time than just buying it?  Of course. Is it worth it?  That's up to you.  Personally, I've been developing the perspective that if I'm going to eat something that's not that healthy for me, I'd rather have it be the highest quality possible (unless I'm specifically craving junk.  I have not yet undertaken making my own devil dogs, hmmm...).

A note about doing this with kids. Once the dough has cooled enough to color and handle, assembling the candy corn is something that I think that kids could help with (of course, be completely honest with yourself about the kids that you are working with. I have some adult friends that I may not trust making candy corn, let alone children.).  As far as the first steps go, however, please remember that making candy has the potential for serious burns, and should not be done with young children.

Oct 1, 2013

Desperately Seeking Samoas

There has been a nasty cold going around Boston, which led to me staying home from work sick for two days. Legitimately sick, not "oops, I have a cough.  Vacation day on the couch for me!".  I am historically very bad at admitting that I am sick and staying home accordingly.  I could be dragging my spleen behind me, and I'd be saying "no, I'm fine, really!"  So this was actually a pretty good accomplishment for me.  The downside was that I fell behind on my blog entries. The upside is the following true story, proving that I am quite happy to laugh at myself.

Despite all of my baking, candying, and other unhealthy food making, I don't tend to keep much in the way of sweets in the house.  I make things, and then tend to just feed everyone around me. Co-workers, friends, my favorite bartenders, pretty much anyone who I think would appreciate a tasty treat. Not only does it give me a way to avoid eating 10 tons of junk, but it also gives me the excuse to keep making new things. Occasionally this backfires, however.

On Monday I had a scratchy throat.  Monday/Tuesday morning I felt as though I'd been gargling razor blades. This was about the time that I decided that work was just not going to happen that day. I proceeded to stay in bed, feeling very grateful for my tablet, so that I could peruse Facebook and chit chat with people at my leisure. Around lunchtime, I realized what I wanted.  I wanted cookies.  Of course, I have no cookies in the house.  There is a 7-11 close by, but I didn't want prepackaged cookies.  That was just not going to cut it.  And there was no way that I was going to attempt to go to a bakery with good cookies.  Let's be honest, there was no way that I was going to leave my apartment. I started the mental rundown of cookie recipes, waiting for my lizard brain to shout "Yes!" (this is, in fact, the way that I tend to make all decisions on what to eat/drink).

Crack, in Cookie Form.
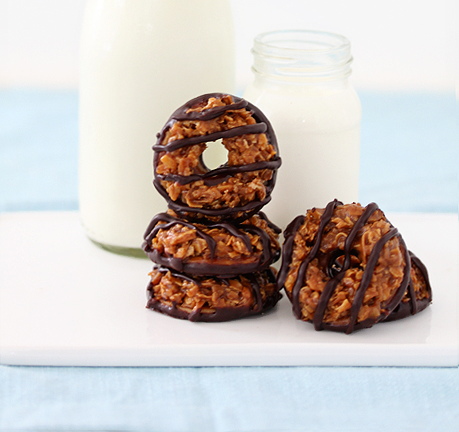
I had found this recipe for homemade Samoas a while back, and had been meaning to try it.  Depending on your girl scout council, you may know them as Caramel Delights.  If neither of these names have any meaning to you, then please, just walk away.  This is not me judging you, this is my attempt to save you from cookie crack. There's a reason that girl scouts sell so many cookies, and Samoas may be that reason.

As soon as I thought of it, my lizard brain decided that is what it wanted, no questions or substitutions.  So I look through the recipe. Basic sugar cookie ingredients, no problem.  Chocolate, no problem (I may have an entire cabinet of chocolate making supplies). Coconut, no problem. Caramels. Fifteen ounces soft caramels. Well, crap. That is a problem. I don't even have a caramel sauce that could be used to fake it. Meanwhile, I know that my lizard brain is not going to be satisfied until I get these cookies. Sigh. 

Well, if there is one thing that I'm good at, it's problem solving. I don't have caramels, and if I just change the flavor profile of the cookie, that is not going to be satisfying.  But! I have sugar. Sugar is in caramel.  And cream. And corn syrup. And despite the fact that I've never actually made caramel, I do know some of the physics of sugar (as a note, I would highly recommend this article by Harold McGee, in which he discusses the melting point of sugar.  It's actually a topic that is still debated). I also had this recipe by David Leibowitz for a salted butter caramel, that I had been tempted to try.

So yes, what I'm saying is that I proceeded to make caramels.  I will give you the full image, for your amusement.  First, I'm sick, with stuffed up sinuses, unshowered, and in my bathrobe.  Because tending to caramel is similar to watching a precocious two year old, it has to be constantly watched.  Therefore, I grab a chair, and sit down in front of the stove, so that I can carefully watch the temperature of the cooking sugar. I can only imagine that the image was rather amusing.  Or maybe it's just me.

The caramels recipe is very good, although they are not "soft" caramels.  The second time I made them I tweaked some temperature points, and used a higher quality butter, and they turned out amazing.  But, that's getting side tracked.  After pouring the caramels into a pan to cool, and sitting down to rest for a little bit, I proceeded to make the sugar cookies, then the topping, and then put them all together. If you opt to try to make your own Samoas, believe it when the recipe says that the coconut burns quickly, and to keep a close eye on it.  The coconut on the edges of the pan will brown very quickly, and not evenly with respect to the rest of the pan.  I did not, however, burn mine (yay!)

I think that I finally had finished cookies at around 7:00 PM. Yes, it was a ridiculous thing to do when sick. Yes, it would have gone a whole lot faster if I'd had proper ingredients. But I gotta tell you, the finished cookies? Totally worth it. Also, I had a little bit of the caramel and coconut mixture left over at the end.  So I made them into balls and just dipped them in chocolate.  All I will say about those is that it is something that will definitely, definitely happen again.

Sep 24, 2013

Using What's Around You

I have always been a fan of crafts that do not take a lot of money or space, for the fairly obvious reason that I have usually had a limited amount of both.  Knitting, for example, takes up a whole lot less space than a wood working shop. And when you don't have to pay for materials, even better! My newspaper route provided me with a ton of plastic straps that I tried doing stuff with as a kid, with little success.  Then, I was a bit weird.  Who am I kidding, I still am.  But! That behavior now is actually somewhat trendy, as I'm just "up-cycling".

I also have a bad habit of looking at a project, seeing the basic structure of how it works, and assuming that I can just do it.  Sometimes it works beautifully.  Sometimes it leads to disaster.  On the good side, at the beginning of the hackey sack craze in the 90's, I saw one and thought "You paid how much for this?  I can make these!"  Several hundred dollars and a case of carpal tunnel syndrome later, I still considered that a win.  On the other hand, sometimes I just end up with a house full of reeds, and a bunch of splinters (just don't ask.)

Which brings us to today's project/materials.  In my small attempt to make my tiny apartment not look like a disaster area, I've been trying to get organized.  One of the easiest ways that I've found to do that is to just have lots of baskets to just throw things into, to hide the mess.  It's less organization and more "out of sight, out of mind", but hey, baby steps, right?  So I've been scouring places like Marshalls and TJ Maxx and anywhere else I can find cheap, but nice stuff, and I had that thought.  "That's how much?  I could make something like this."

Before I go into details about the whats and hows, take a look at the finished product.

Can you tell what the materials were?  I'll give you a hint, it was completely free.

If you guessed plastic bags, you're correct! So I'm going to show you how I transformed some old shopping bags into a basket. For this week, it's all about turning the plastic bags into cording that you can use for this, or any other project (Knitting, crocheting, whatever).  The next post will go into how I turned that cord into a basket. 

The materials that you will need:
  • Plastic shopping bags 
  • Scissors
Additional item that can be helpful:
  • Drop Spindle

Creating Cords

No matter how you decide to do a basket, or what you decide to do with your plastic bags, it helps to first have them in a workable format. First, only use bags that are clean and dry. That should be obvious.  Are any ripped?  Depending on how you're going to use them, they could be just fine. In this case, everything is taking the form of a cord (yes, I know that there is a portmanteau for plastic yarn, but I think that it's stupid, and refuse to use it). This means that I will have to join multiple strips of plastic together. For the white plastic bags, as I want that rope to have a small gauge, the strips will be about one inch wide.  I would recommend not going narrower than that.  In my experience, when I was spinning it that way it started to lose structural integrity, and snap. 

Cut a small hole in each end of the strip.
Cut a small slit in each end of the strip
The pieces will be woven together, so cut a small slit near each end of the piece. To connect the pieces, interweave the two pieces like in the photo to the right, and gently pull tight. The two different colors in the photo are shown for the purpose of demonstration.  Unless you want your rope to change colors, both pieces would normally be the same color. 


Thin Cord


The hardest part of this: keeping the cat from attacking the plastic.
For the thin white cord, I opted to do all of it at once, using my drop spindle.  If you don't know what a drop spindle is, it's a very simple tool used for spinning wool into yarn. While I was making the basket, I would just break off pieces about the length of my arm to work with. If you don't have a drop spindle, you can either twist it manually, or attach each piece to a wrench, pen, pair of scissors.  Pretty much just something that you can twist, but won't break your plastic.  As you can see in the photo, the drop spindle just looks like an elongated top, with a hook at the top. The basic way to use it is just to spin it, allowing the length of cord you're working with to twist itself. Then, once a section is done, wrap the cord around the base and start on the next section.  Before you run out and spend any money on something that you're making because it's free, can you think of something that you have lying around that can help you do the same thing?

The Thick Cord

The brown plastic bags will be playing the role of the pine needles in my basket.  I want the cord that they become to be much thicker, so I am not going to be cutting them into strips.


Lay the bag out flat on the table

Fold one third of the bag in towards the center.
Fold the bottom one third up to the top, so the bag has a folded edge on both the top and the bottom. This will leave you with a long rectangle, the handles of the bag at one end.

Fold the bag in half one more time.

Make a slit in the end that was the bottom of the bag. Repeat these steps for each bag that will be used.
With the two bags that you want to connect, slip the handles of bag 1 through the slit in bag 2.

Then slip the handles from bag 2 through the handles in bag 1 (see now why we only needed to make one cut?)
Gently pull the two bags taut.
Twist to form a cord (for this one, I did not use the drop spindle, and just did it with my hands).

The bags from my local supermarket make a cord that is about 1/4 of an inch diameter.  Depending on the bags that you use, it could be rather different.
While it may look a little uneven at the moment, we will continue to adjust it while we make the basket.

Next: Turning your cord into a pine needle basket.

Aug 12, 2013

Who Needs a Pattern to Make Socks?

*** Update***

People have requested this in inches as well as centimeters, so I have tried to add that math as well.  Honestly, I find centimeters easier to deal with on projects where I have to do math.  If the measurement is 1 centimeter and 1 millimeter, it is simply 1.1.  On the other hand, 1 7/8 inches I have to convert to 1.875 inches (and have to use my calculator).  Thus, if I can avoid fractions, I will.

As a resource so that you don't necessarily have to do math with fractions, here are the corresponding decimals for the "inches" measures.
1/8= .125
1/4= .25
3/8= .375
1/2= .5
5/8= .625
3/4= .75
7/8= .875

****

I've been on a bit of a math/science kick recently, and I figured that I would run with it.  After seeing this video on knitting two socks at a time, I decided to try breaking in a circular needle that I got for Christmas, and try to put a dent (ok, who are we kidding, a tiny nick) into my yarn stash.  If you have never knit a sock before, you might not want this to be your first attempt.  Also, if you are unfamiliar with the magic loop method, you might want to look into that as well.

So, here are what you will need to make 2 socks at the same time:
2 skeins of yarn
1 long circular needle (the one I'm using is 32 inches long)
stitch holders (I just use safety pins)
measuring tape
a spot to take notes

Step 1: Make a test swatch. 

I know, it's the least fun part of any knitting project.  But it's important.  Make a swatch with the yarn, needles, and stitch pattern you're using, make it a reasonable size, bind it off, wash it, see how it reacts and if you like it.  Because honestly, if you're going to spend several hours making something, it's always better to know you're going to like it, and avoid being sad with the results.
You can always work on your swatch while doing something more enjoyable, like getting a pedicure.
In this case, I know my yarn.  I've used this yarn before, and I know how it behaves.  I still did a swatch.  Not as big as I would normally make (as I partially did it just to get to the same point in the striping as the other skein), but I still did it.
See?  Mini swatch (in the round, so it's twice as wide), but I did one!


Step 2: Measurements

I have my swatch, and I've calculated my gauge.  For my yarn, with a size 2 needle, I have 30 stitches for 11 cm (4 1/3 inches), and 3 cm (1 1/8 inches) for 11 rows.  So now I need to figure out what I will be covering with it.  I figured that the easiest way to demonstrate this next part was on paper.  You do not have to trace your foot, but for the purposes of this post, it was easy to demonstrate.  So, I give you my foot:
 There are a few measurements that we're going to mark down on our foot (you notice that I left some space on the side of my paper for notes?  Ha ha, there was a reason for that!  First, I measure what I want the toe of my sock to be.  Looking at my drawing, it looks like a good width for the toe is about 4.5 cm (1 3/4 inches) (measuring across the big toe and second toe).  I have learned over the course of time that usually the width of the heel is about the same as the width of the toe.  In this case, we don't have to make assumptions, as we have it right there, and we can measure it!

And yes, the width of my heel is also about 4.5 cm (1 3/4 inches), so I'm going to call that good.  I note that down on my foot drawing as well.  The total length of my foot is 24 cm (about 9 1/2 inches).  I break that measurement up into two measurements.  There is the length of the sock that I will work straight from the toe, and then there is the length over which I will decrease to get to the heel.  For this case, I will go with a general rule that you start working the heel about an inch and a half (or 3.8 cm) before the edge of the heel.  So I will work straight for 20.2 cm (8 inches), and then work the heel over the last 3.8 cm (1 1/2 inches).  The last two measurements I can't do with the sheet of paper.  The circumference of my foot, and the circumference of my calf.  My foot is 21 cm around (8 1/4 inches), and my calf (at the thickest part that the sock will cover) is 24 cm (9 1/2 inches).  That's it.  Confused?  Let me break it down for you this way, to hopefully be clearer:
Foot Length: 24 cm (20.2 cm+ 3.8 cm) or 9 1/2 inches
Toe Width: 4.5 cm or 1 3/4 inches
Heel Width: 4.5 cm or 1 3/4 inches
Foot Circumference: 21 cm or 8 1/4 inches
*Calf Circumference: 23 cm or 9 inches

* I am planning to finish my sock below my calf itself.  This measurement is for the thickest area that the sock will cover on the leg, so I know how wide to knit the leg.


Step 3: Math

Wait, no, don't run away!  It's really not bad, I promise.  What we are going to do is calculate how many stitches to cast on, how many stitches to increase to, and about how many rows it will take until you start working on the heel.  So we go back to our test swatch, and look at our gauge. I want to cast on enough stitches so that I will start out with 4.5 cm.  So to phrase the question: If I have 30 stitches for 11 cm (4 1/3 inches), how many stitches do I need for 4.5 cm ( 1 3/4 inches) on each side?

4.5 cm X 30 stitches/11 cm= 12.272 stitches
1 3/4 inches X 30 stitches/4 1/3 inches= 12.209 stitches

Ok, so I'm casting on 12 stitches (I'll just round the stitch count) for the top of the foot, and 12 stitches for the bottom of the foot, meaning 24 stitches (but don't forget the 12!). So where do I want to be once I finish increasing for my foot?  This measurement was for the entire way around the foot, so there will be no need to double it.

21 cm X 30 stitches/11 cm= 57.272 stitches.
8 1/4 inches X 30 stitches/ 4 1/3 inches= 57.558 stitches

Considering the negative ease of a knit garment, and the mental ease of keeping with round numbers, I am going to try to go with either 56 or 58.  As I know that I will be increasing by 4 stitches every other round, 56 will probably be easier.  But, as I'm making this sock from the toe up, I will have plenty of opportunity to try it on as I go.  As long as I keep my increases the same on the left and right side of the sock, I will be able to fake it.

Personally, I don't really care about rows.  I know the length that I will have to knit to though.  But, just for a little more practice with the math, let's just see about how many rows I'll be knitting before I start on the heel.

20.2 cm *11 rows/3 cm= 74.06 rows
8 inches *11 rows/1 1/8 inches= 78.22 rows (This is one of the reasons I prefer working with centimeters.  Not only is the math easier because I can work in decimals, but millimeters are smaller than 1/8 of an inch.  So the way in which you round your measurements can have an impact on your math.)

So, starting right here, if we know a little bit about how to make a sock, we can start writing our own pattern. kfb means to knit once in the front of the stitch, and then once in the back of the same stitch, which adds a stitch.

Toe:
Cast on 24 stitches using magic loop knitting method.
Round 1:knit.
Round 2: (knit 1, kfb, knit to last two stitches on needle, kfb, knit 1) twice.
Round 3: knit.
Repeat rounds two and three seven times: 56 stitches total.

Foot:
Round 1: knit.
Repeat round 1 74 times, or until the sock is 20.2 cm long.

Wow, this looks like it could be an actual knitting pattern, doesn't it?

Step 4: Cast On

After all that, I am finally ready to cast on.  This is the first time I am trying to make both socks at the same time.  I have seen methods where you can make one sock inside the other one, which will work with either the magic loop or using double pointed needles, but that requires way more focus than I tend to have.  With that method, I could see myself knitting them together and not even noticing for multiple rows.  Knitting the socks side by side makes it much more obvious if I have knit them together, and also makes it easier to try them on as I go.  So let's get started.

  1. With the first ball of yarn, tie a slip knot, and slide it on to one needle.
  2. Hold the two needles parallel, with both needles pointing to the right. The slipknot should be on the bottom needle.
  3. Bring the yarn behind both needles, and wrap the yarn up and over the needles, coming down in front.  Remember when I said to not forget the 12 stitches? I am going to wrap the yarn around my needles 12 times.  Each loop is casting on a stitch for the top needle and for the bottom needle.
  4. After the 12th loop, bring the yarn over the top of both needles, and bring it in between both needles, basically to hold it in place.
  5. I slide my stitches to the left just a little, so that I have space to cast on my second sock.  This is done the exact same way that the first one is.
  6. So we have 48 stitches on the needles, and it's time to start knitting.  If you need a tutorial on how to use the magic loop method, you can find one here.  Essentially what I'm doing is this: I'm keeping the stitches for the top of the sock and the bottom of the sock separate, so that they can lie flat.  I pull some slack from the bottom needle, bend it, and knit off of the top needle.  For this first round, I pull the yarn out from between the two needles, and knit 12 stitches across the top with the second ball of yarn (which is the same ball that I cast on with). When I finish the stitches for sock 2, I drop the yarn, and pick up the yarn for sock 1, being careful to not entangle the two. Then, using that yarn, I knit across the 12 stitches on that sock.
  7. Now that I've finished the first 12 stitches on both socks, it's time to do the other side.  I flip the knitting so that the stitches that I just finished are the bottom needle, and the stitches that I need to do are on top.  I slide the needle on top down so that the stitches are easily accessible, and pull out slack on the bottom needle. There are 12 stitches on this side, plus the slip knot that I started with.  I slide the slip knot off, as that was just there to keep the yarn in place.  I knit the 12 stitches for this sock, drop that yarn, pick up the yarn for the other sock, and do the same thing.  I drop the slip knot, and knit 12 stitches across.
    Close up of Cast On Stitches
    Cast On Finished
Now I have completed the first row of my socks!


Step 5: The Toe and Foot

I've now completed my first round on both of my socks. Now it is time to start increasing (otherwise I won't be able to fit my foot inside!) I decided to do a very simple toe. I knit the first stitch, increase by one stitch (I often opt to do a kfb), and then knit to the last two stitches on the needle (for this sock). I have added one stitch to the right side, and now one stitch to the left side. This will mean that my sock will end up coming to a nice point, and not just slant off to the side. Also, for the toe, any increases I do on the top, I will mirror on the bottom, because I want the side seams to stay on the sides, and not wander underneath my foot or anywhere else.  If a wandering seam is a feature that you want to incorporate into your design, go for it! Just remember to do the same thing on each sock.

Why am I doing the exact same thing on each sock?  Because I want the socks to match. I am doing them at the same time so that I don't have to think about how many rows went into the sock I just finished before I turned the heel, and that sort of thing. This method ensures that, as long as you do the same thing to each sock, they will turn out the same size and shape.

After I finish the round, I have increased each sock by 4 stitches, two on the front, and two on the bottom.  This gives me a total of 56 stitches on my needles (28 per each sock). I knit a round, and then increase again.  I keep up this pattern until I have 112 stitches on my needles, 56 stitches for each sock.

When I did my math before, it indicated that I should have 57 stitches for each sock, but I was going to try it with 56. Do you see why now? It wouldn't require any odd increases! But I am not one hundred percent sure if that will work. Conveniently enough, I am making them from the bottom up, so it's super easy to just try them on. Thus, that is exactly what I do.
One wonderful thing about knitting small projects is that you can do it anywhere, like the park I'm in!
Conveniently, 56 stitches works beautifully, and this gives me a nice hint of how the self striping yarn will work for these socks, as well as how they will feel on my feet. I am quite happy with all of this. Now, as I'm letting the yarn create the pattern for me, I just keep knitting in the round until I reach 20 cm (7 7/8 inches).

Step 6: Turning the Heel

I know it looks a little short, but that's just because it rolled up while I was photographing it.
I have knit and knit and knit, and I am finally ready to start on the heel! Now, before I start explaining the heel, first I want to talk a little bit about customization.  One of the reasons to make your own socks is that you can make them fit you perfectly. I am fortunate, in that my feet are a fairly average shape. Therefore I know that my heel will be about an inch an a half before I turn it, I will be decreasing to the same number of stitches that I used for my toes, and that my ankle isn't that much wider than my foot.  Your feet may not be the same.  Just like with any other clothing, the problem isn't with you, the problem is with your pattern.  By multiplying the width of the area the sock needs to cover by your gauge, you can calculate increases or decreases however you need to, in order to make your perfect sock.

With that said, let's move on.

As with socks that are worked from the cuff downwards, there are many different ways to do the heel.  For this pair, I opted to go with the method that was used in the video I referenced at the beginning of this post. It uses short rows, but there are no wrapped stitches.  Now, before I show you any pictures, I have two confessions to make.  First, I'm lazy.  I'm not going to do something if I don't see a logical reason for it (and even then it's 50/50). Second, I'm not a big one for gadgets.  I tend to do so many different crafts and such that I have neither space nor money to have every tool for everything.  Therefore I tend to take the Alton Brown approach and apply it to crafts.  All about the multitaskers!

To knit the heel, we're going to go from knitting in the round to knitting flat.  Why? Because we only need to add length to the bottom part of the sock. In the video, it looks to me as if the woman demonstrating puts all the stitches from the front of the foot on a separate needle/stitch holder. I didn't do this.  As I'm using one long circular needle, all the stitches seem pretty secure where they are.  It may have caused a minor hassle while knitting and purling back and forth, but I don't think it added up to what I would consider the hassle of putting aside the stitches and then picking them back up.  Also, as the knitting method itself provides a break between the front and the back of the sock, the stitches used for the heel were already separated.

The pattern for the decreases goes like this:
row 1: knit to the last stitch, place that stitch on a stitch holder (I just used a safety pin). Go to second sock, and with the appropriate yarn, knit to the last stitch, and place the stitch on a stitch holder (safety pin number 2).

row 2: slip one stitch, purl to the last stitch, place on a stitch holder (safety pin number 3). Change socks, and with the appropriate yarn, purl to the last stitch, and, you guessed it, place it on a stitch holder (and safety pin number 4).

row 3: slip one stitch, knit to the last stitch, place on a stitch holder, change socks, knit to the last stitch, and place on stitch holder.

I am going to repeat rows 2 and 3 until I have 12 stitches left on my needle. Now, remember before when I said that I am lazy? If I was being really proper, I would have each of those stitches on their own stitch holder, so that I wouldn't risk dropping stitches, it was easy to count how many stitches I'd taken off, etc.  I didn't do that.  I used four safety pins, that were each about one inch long.  You know what? It worked just fine.
One sock after all the stitches had been put onto my "stitch holders"

Now that I've finished adding my extra length for my heel, now I need to work all those safety pin stitches back in, to finish the ankle for my sock.  So after I have done all of my decreases, I knit to the last stitch, again, but this time I remove a stitch from my safety pin, and knit the two together, for the purpose of minimizing gaps in the finished sock.  But I don't actually want to get rid of any stitches, so I also knit one more in between the gap from the last stitch and where the next stitch sits on the safety pin.  Repeat on the other sock, and then do the same thing on the purl side of the heel. I repeat this process until I have all of my stitches worked back in, and I can just continue working in the round.
Yup, seems to fit to the heel pretty well.

Step 7: The Leg

The leg is pretty straight forward, now that I have all of my stitches back onto my needles.  I just knit in the round until the sock is about 2.5 cm (1 inch) shorter than I want it to be.  That is about how long that I've decided that I want my cuff to be.

A note about sock length.  There is a great variety of lengths that you can make a sock.  I had a friend, who saw me doing both socks simultaneously, ask if I could just make tights this way.  You know what?  I could, if I so desired, had taken the proper measurements, and had enough yarn.  They would be pretty thick tights, but it could be done.  The one guideline that I would give is this: the minimum length of your sock should be long enough that the sock will not start slipping off of your foot when you wear it in shoes.  As a shot in the dark, I would say that it should at least reach the Achilles tendon.  Other than that, feel free to go wild!  

If you know that you have thick ankles, very curvy legs, or any other fit challenges, keep that in mind, but remember, one of the reasons that you are making your own socks is so that it will fit like a glove, er, sock! It is the same process: measure, calculate, and make your increases/decreases.  Just make sure that, if you make a very curvy sock, your foot and heel will still fit into it. Knitting Daily has some tips on this very topic.

For the socks that I'm making, I decide to stay pretty standard.  I am going to knit the leg to be about the same length as the foot. I consider that a good basic sock length.  The widest area that the sock will cover is only 2 cm wider than that of my foot.  As that is also the area that will be the ribbing, the stretch in the knit should be just fine, and I don't think that I will have to add any stitches. The negative ease here should help to keep my socks up.

Step 8: Ribbing

I finished the leg, and am ready to start my ribbing. Oh. I didn't consider the ribbing pattern earlier.  That's no problem, it just means a little more math! So let's see. I have 56 stitches, and the knit/purl of the ribbing needs to repeat.  Therefore, what I am going to do is calculate what stitch patterns would work evenly into the stitches that I have.

56/2 (knit 1 purl 1)= 28 whole number, so it would work!
56/3 (knit 2 purl 1 for example)= 18.666.  Ooh, that would not work, it's not a whole number.
56/4 = 14 That would work!
56/5= 11.2 Nope.
56/6= 9.333 Nope.

Without adding any stitches, it looks like my options are a ribbing in a set of 2 (knit 1 purl 1), or a set of 4.
ribbing for a set of 4 would be any of these:
knit 1 purl 3
knit 2 purl 2
knit 3 purl 1

I choose to just go with a simple knit 2 purl 2 as my ribbing.  It's easy to remember, it's stretchy, and I like the look of it. So I'm going to repeat this for about 3 cm.

Step 9: Binding Off

Let's do a quick recap.  We dutifully did our test swatch, we measured, we calculated, we knit, we did more calculations, we tested along the way, and we have something that perfectly fits that we've spent a whole lot of time working on.  There is one thing that we can do at this point to make these beautiful, wonderful socks into something that we don't ever want to wear.  Bind them off too tightly.  If I bind off too tightly, I could make the socks uncomfortable, as they cut into my calf, and essentially ruin the point of the nice stretchy ribbing I just finished.  Even worse, I could make it so that I can't get my foot into the sock properly.  Do you doubt me?  Go ahead, take the swatch that you made and probably just did a basic bind off for.  Notice how the bound off edge is nowhere near as stretchy as your ribbing?  I rest my case.

I know for a fact that I tend to bind off tightly.  Therefore, I am not going to do the standard bind off that I learned when I was about 7.  I am going to use an elastic bind off:
K1, *k1, slip 2 stitches back to left needle, k2tog through back loops; repeat from * to the end. Fasten off.

Wow, the socks are done!  Both of them!  Now all I need to do is weave in the ends.


Summary

With a few measurements, a few techniques, and a little math, it is possible to create just about any perfectly fitted knit garment without a pre-written pattern.  In this case, it was a pair of socks.  This would also work for a hat, gloves, a sweater... Pretty much anything you can think of.  As long as you are diligent (and honest) with measurements, know your gauge, know your material, and calculate your stitches, you can make just about anything.